
Security For Everyone - 2023 Update
This post will go through some of the steps you can take as an individual to secure the accounts that mean the most to you.


It has been a while since I've done any form of blog post, and for the most part, it has been because I've been busy doing a myriad of other things.
However, one of the common issues I've spotted in recent times is that security, for the most part, is a pain ( yes, I work in it, and computers are the scum of the earth!). Still, a stand-out item is the rise in scams, phishing, account takeovers, lack of general security knowledge for Joe or Jane public, and the unfortunate timings of events. Why the random intro paragraph, Andy? Well, a few of my close friends and connections have been subject to various scams and phishing attacks over the last few months, and while I wrote zero to technical hero a few years ago now (with the last post being just under a year ago), you can read all four here:)
- ZTH Series
- CH01 - Explaining the terms
- CH02 - Security Advice
- CH03 - Troubleshooting things
- CH04 - Phishing and Advice
But there are new apps and new techniques, and the series needed a bit of a refresh. I will go through some of the steps you can take as an individual to secure the accounts that mean the most to you. If you have a website, here are some tips that give you some options to set up a more secure setup; now, if you are reading this and are a security professional, you may well disagree with the suggestions that I am making but hear me out; nobody outside the security community cares about what we think.
Chapter 3 in my ZTH series dove into security advice and my top 5 tips at the time for improving your security approach to things; now, a lot of that advice is largely the same but with some changes. At a high level, the top 5 in that post were as follows:
- Use Multi Factor/2-factor authentication
- Don't use the same password everywhere
- Be vigilant about emails and links sent to you on social media
- Install Updates
- Be careful with how much information you share online.
Rather than deep diving into each of them, the critical two here are passwords and MFA/2FA, Do not share passwords and consider using a password manager or, in some cases, a password book, as you're more likely to be phished or attacked digitally than you are to be robbed, so if you use a password book to write your stuff down at home then so be it, it's not the advice everyone is going to give you but if it works for you do it. I would prefer you used a solution that was easy for you and thus easier to manage than overcomplicate things.
Multi-Factor(MFA) is a pain on its own, but the security benefits it adds are worth their weight in gold; here are a few of the common apps people use nowadays and how to enable MFA.
Instagram & Facebook
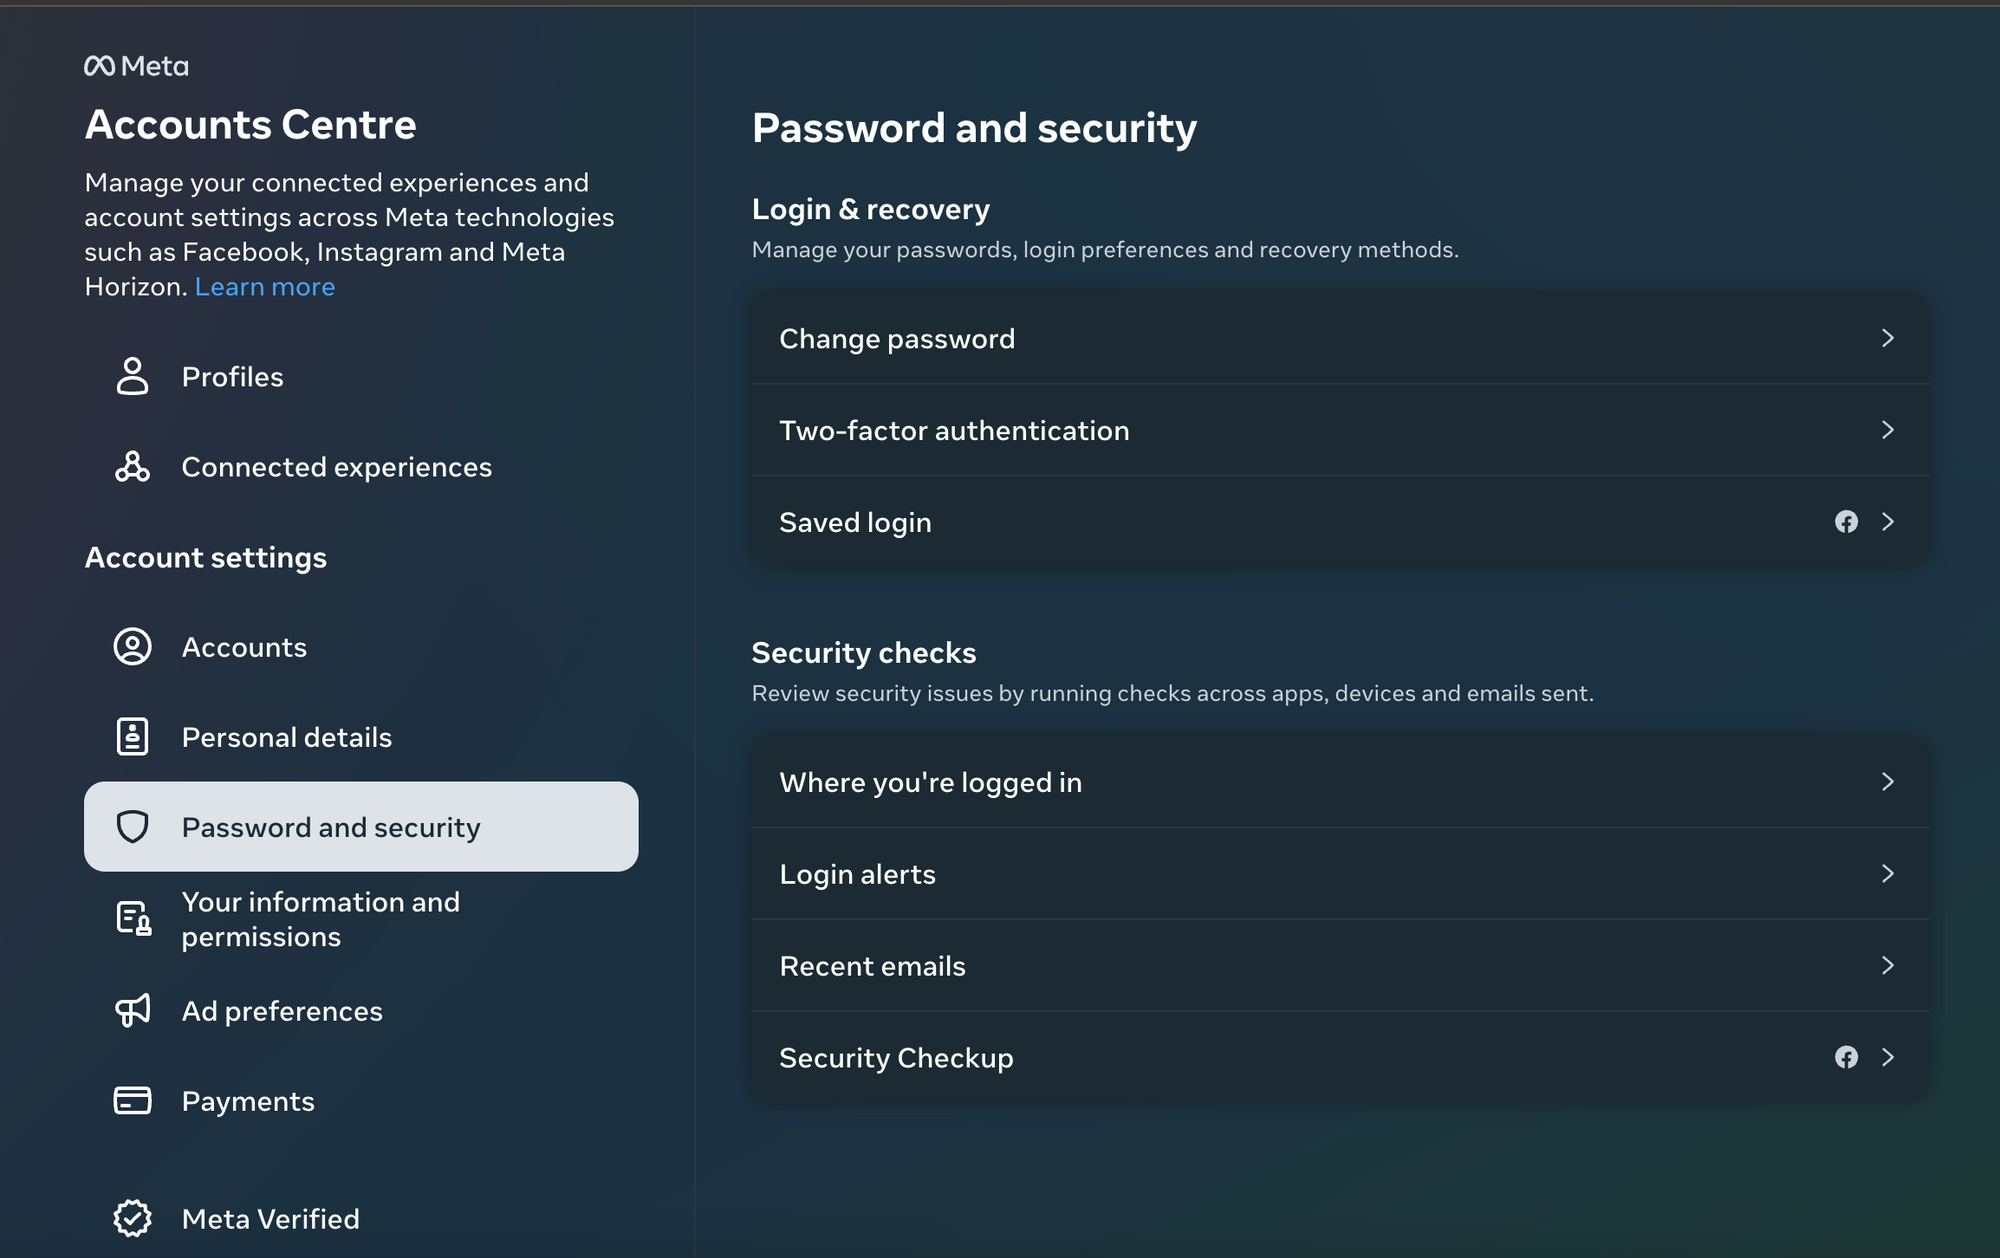
To manage your Instagram and Facebook MFA settings, navigate to the meta accounts dashboard here; https://accountscenter.facebook.com/password_and_security
You can also access this menu from within Instagram by clicking the burger menu at the top right of your profile, then navigating to settings and privacy and then accounts centre, which takes you to the above URL, whereby the settings will be the same as described below.
This will direct you to a page similar to the following:
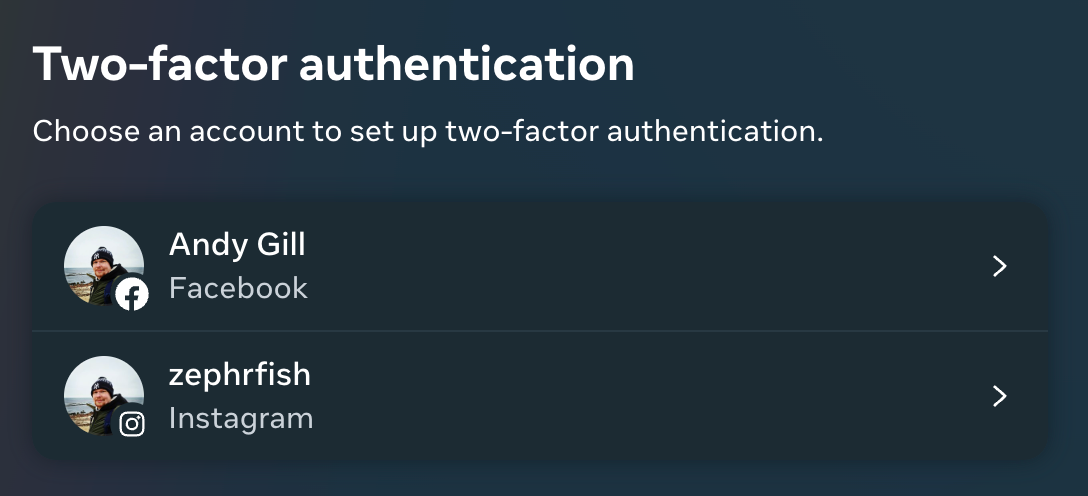
From here, navigate to Two-Factor Authentication and select whichever account you want to enable MFA on;
Each has several options available, such as app, SMS-based, key-based and other methods:
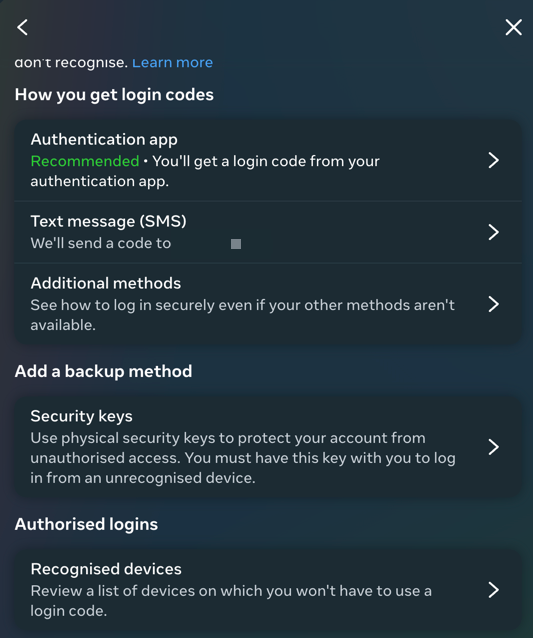
Once enabled, each time you log into meta services such as Instagram and Facebook, you'll be prompted for a 2FA/MFA token in addition to your password, thus satisfying what you have; an MFA token and something you know; a password for authentication.
TikTok
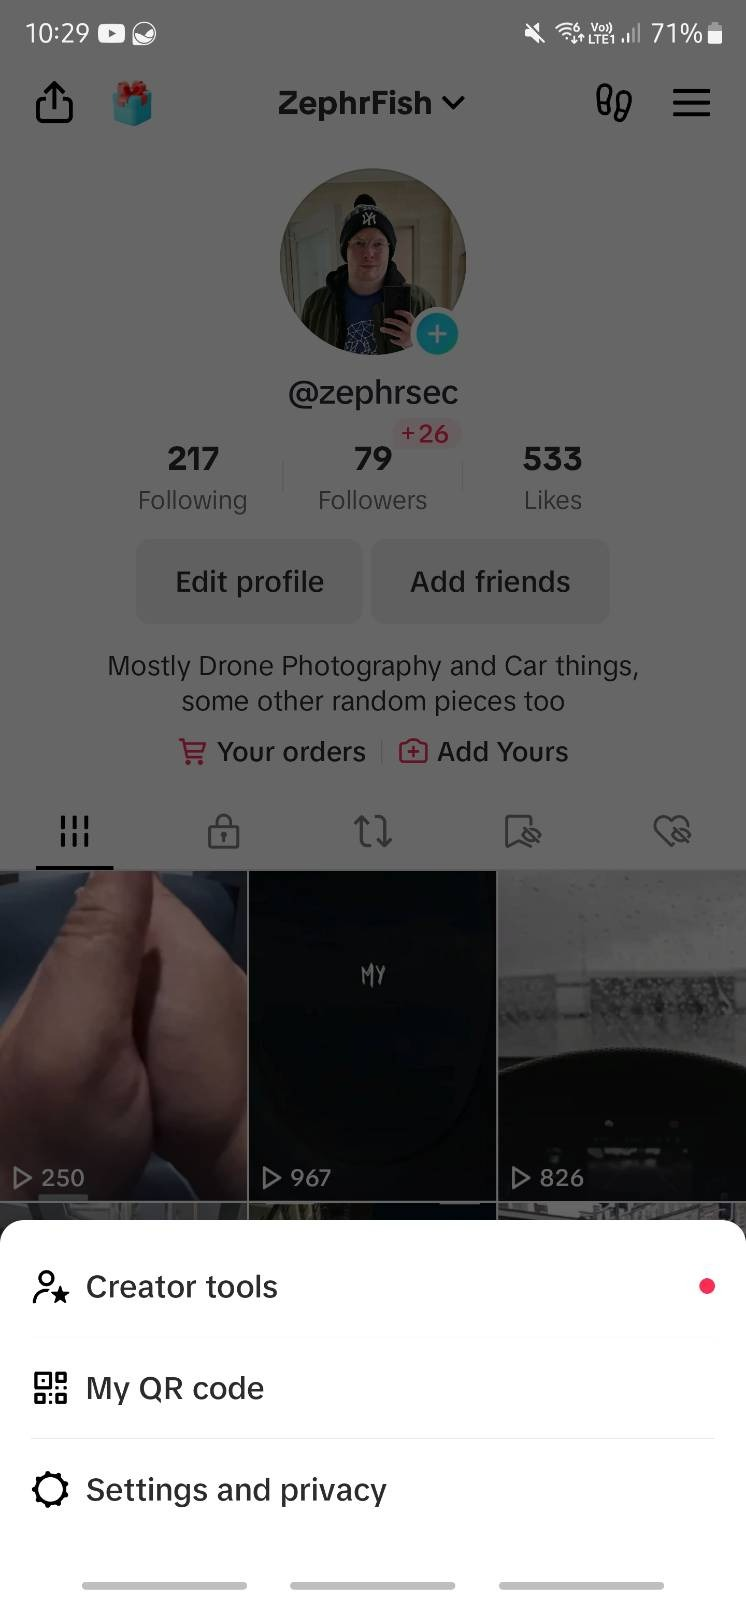
For TikTok, navigate to your profile in the app then, click the menu at the top right, then navigate to settings and privacy -> Security -> 2-step verification as shown:
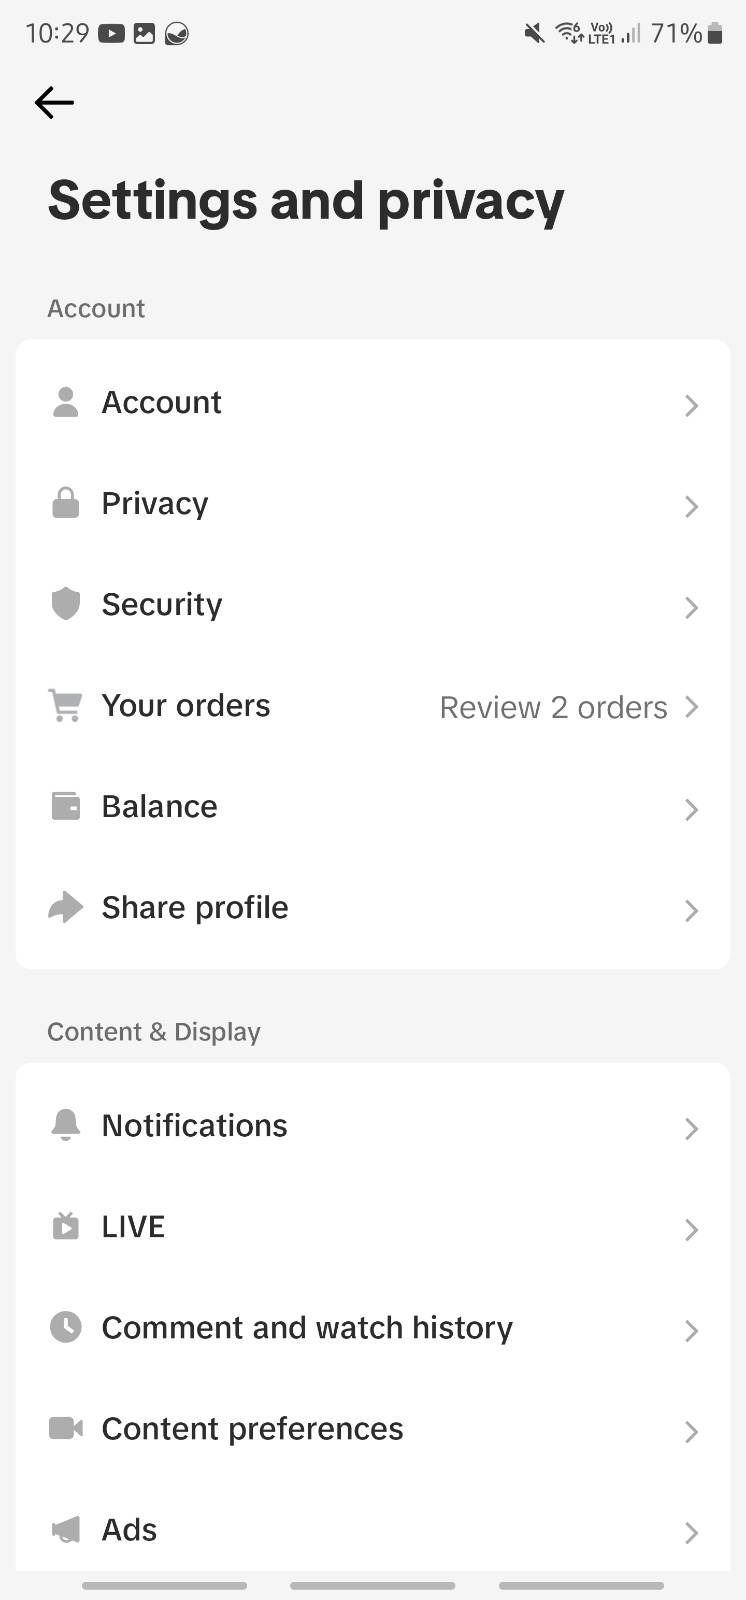
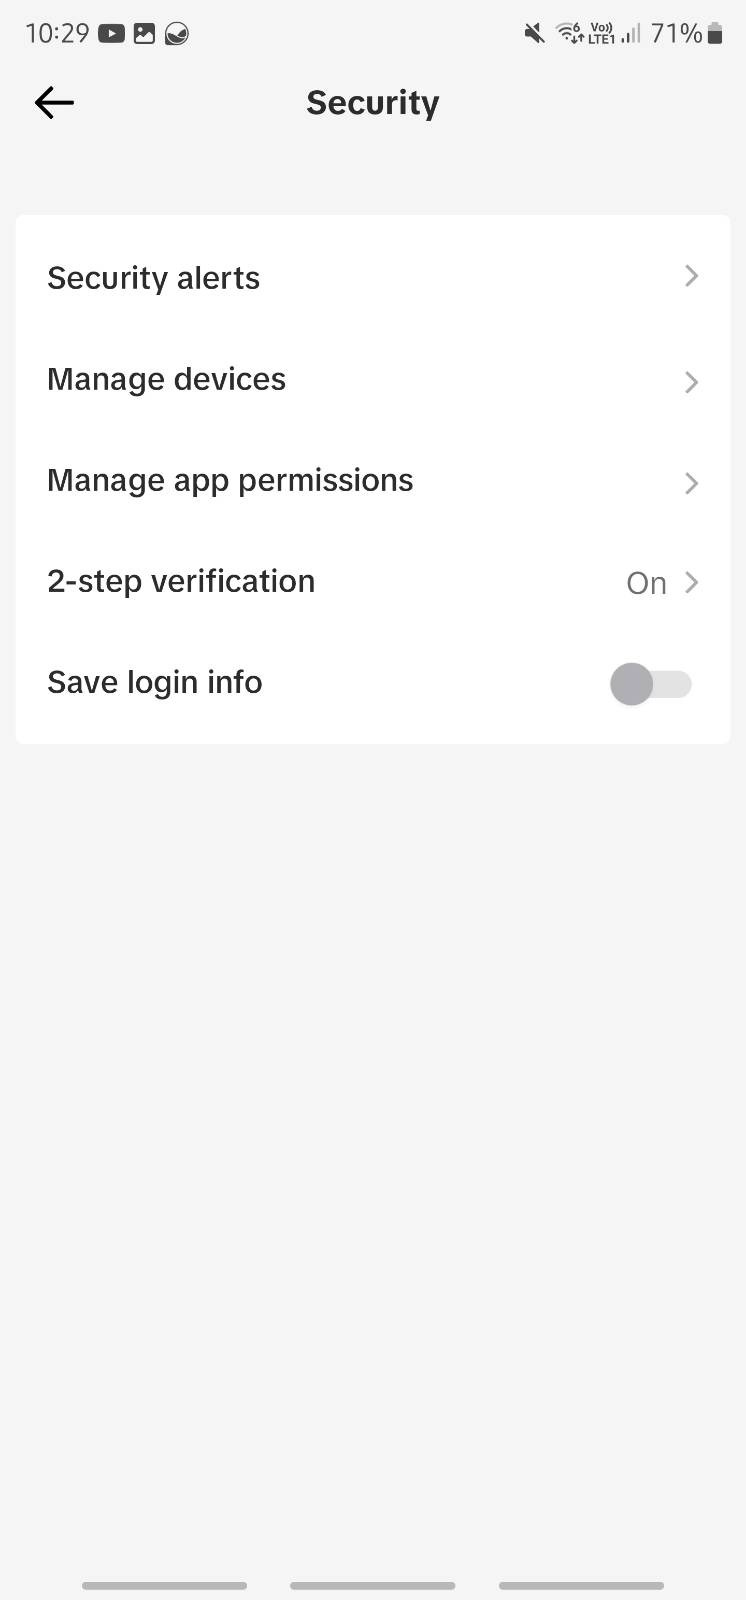
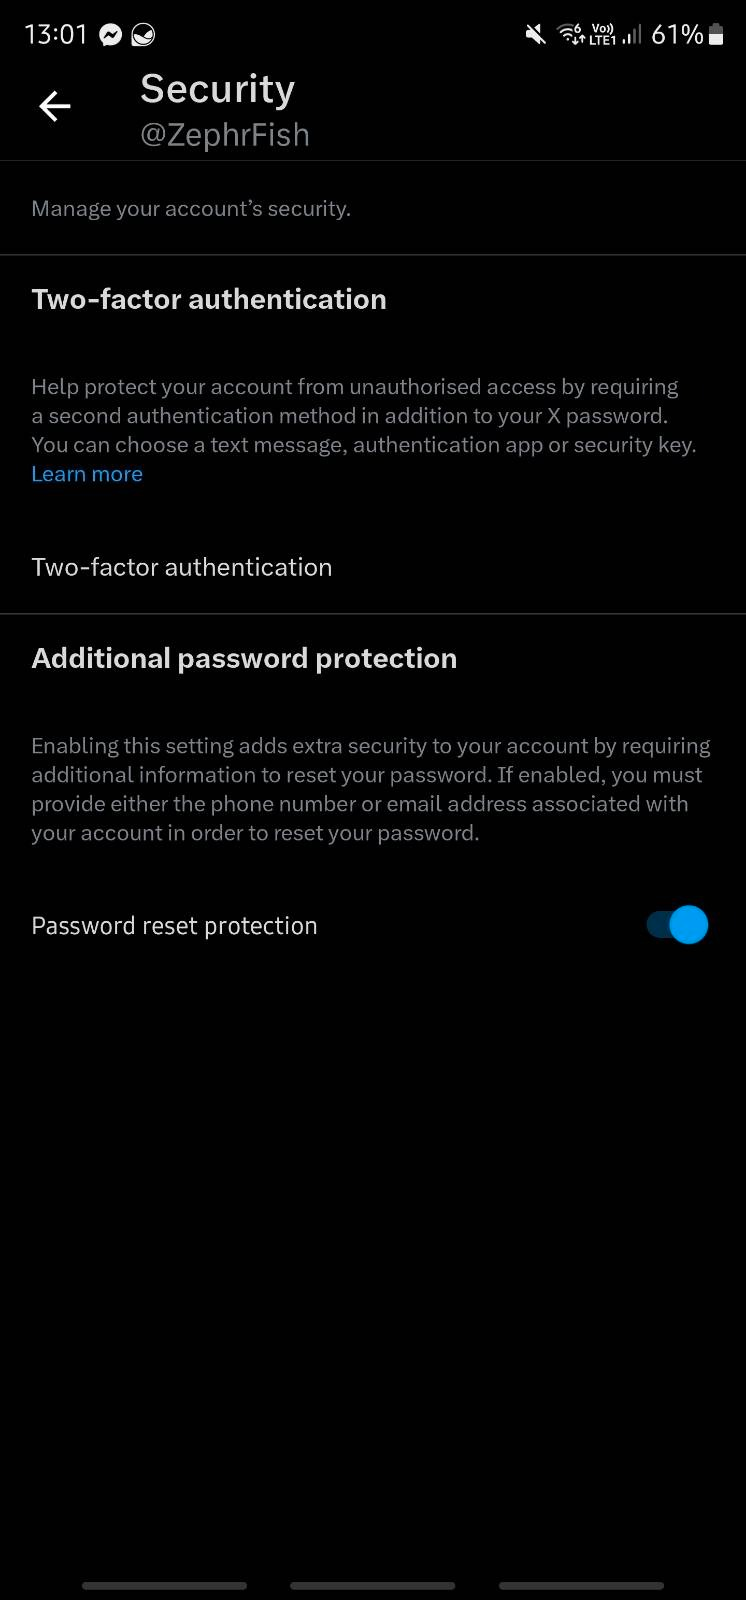
Twitter/X/whatever it is called this week.
- Navigate to 'settings and privacy'
- Click on security and account access -> Security.
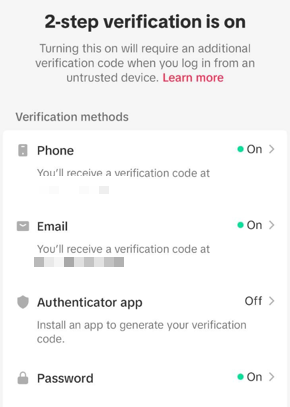
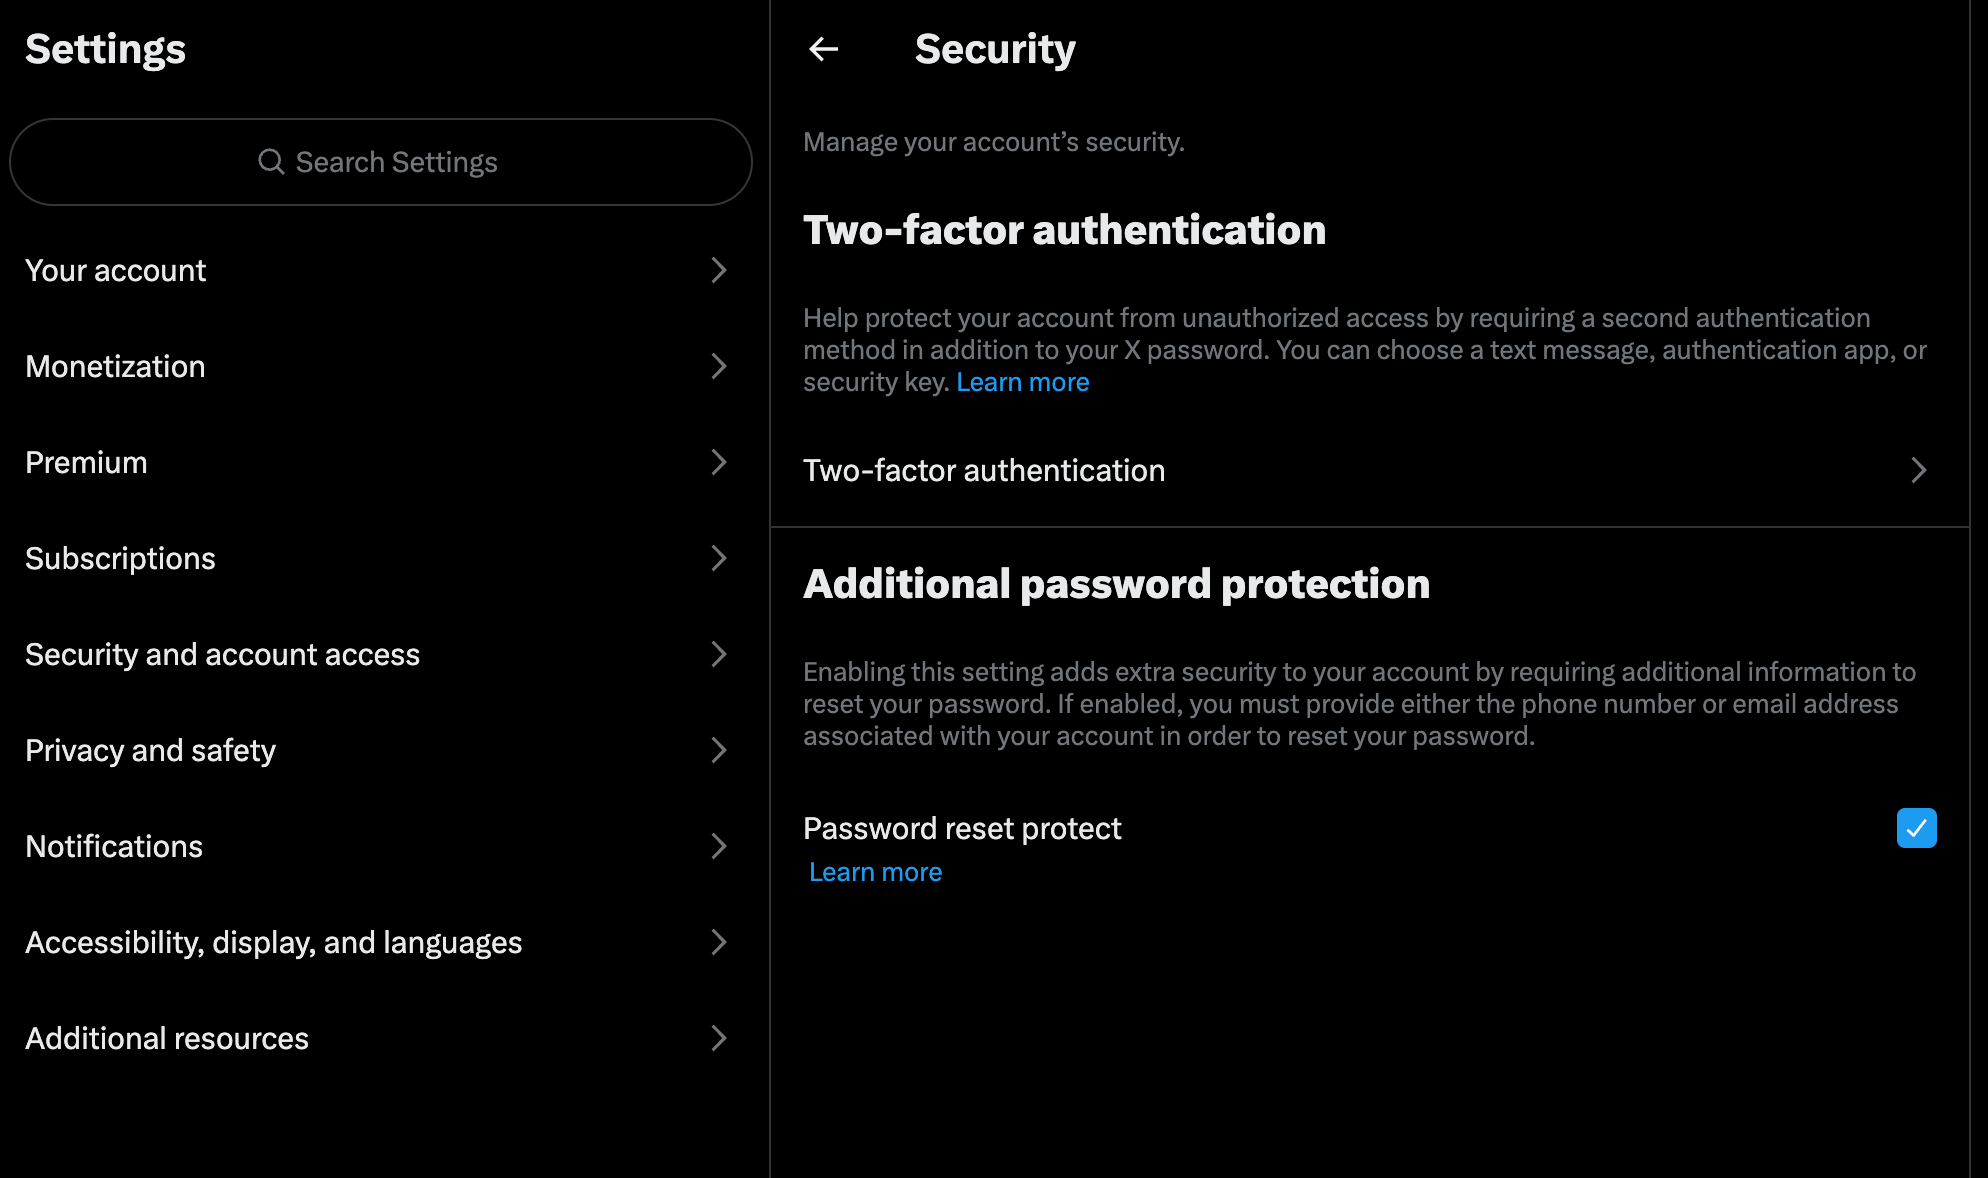
- Navigate to Two-factor authentication as shown below on desktop and mobile:

Select an authentication app and download Google authenticator or one of the many other authentication apps for MFA management; follow the steps on the screen and make sure you make a note of the backup keys the app gives you(you'll need these if you ever forget your MFA token or lose access).
Emails
I've picked three of the most common email providers and shown how to setup MFA on them. However, the process is generally the same across them all; if your provider is not listed here, typically navigating to settings and finding security settings will point you in the right direction for enabling multi-factor.
Gmail
- Open your Google Account.
- Navigate to the Two-Factor Authentication Section
- Select "Getting Started"

O365/Live/Outlook/Hotmail
Navigate to your Microsoft Account and select Security Basics; https://account.microsoft.com/security
- Select More security options.
- Under Two-step verification, choose Set up two-step verification to turn it on, or choose to Turn off two-step verification to turn it off.
- Follow the instructions.
This will enable MFA/2FA across all of your MS services and cover Outlook, Office 365, Hotmail and Live along with any Xbox or game services too.
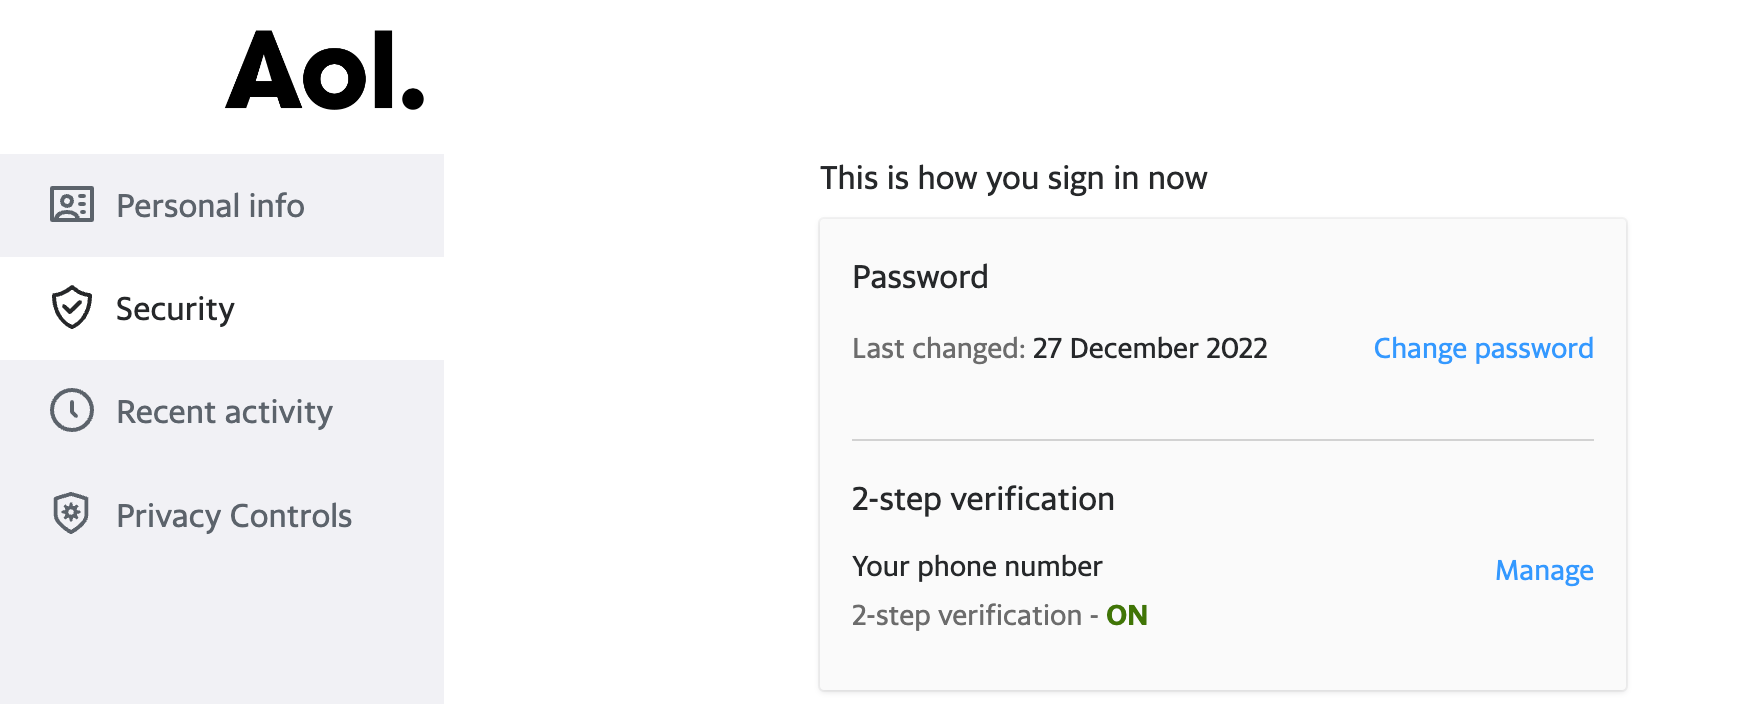
AOL
For AOL, navigate to https://login.aol.com/myaccount/personalinfo then click on security and scroll down till you see 2 step verification:
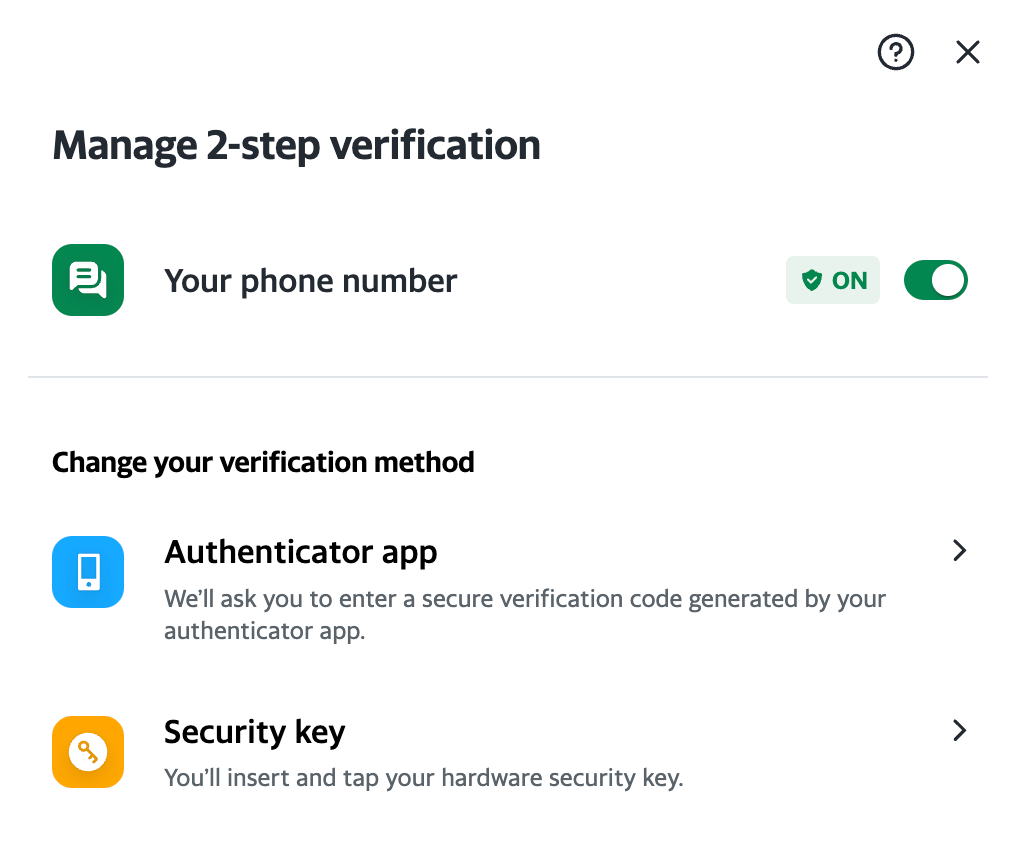
Click on manage and choose an option, the suggested option is to use an authenticator app but phone-based authentication also works as it is better than nothing:
Combine MFA with a unique password per app, and you're onto a winner; coming up with passwords can be hard, but the advice more and more is passphrases, think of a phrase you like or a song lyric or a quote from a movie and roll with it, maybe throw a number or two in there and some spaces to make your life a bit easier to remember and appease complexity requirements.
As mentioned earlier, using a password manager is great practice, and equally having one master password to remember makes life 10x easier, but one methodology I like to follow is having a few key passwords and the rest randomly generated by a password manager; I set aside the services I use most often and are critical to me and memorise a passphrase for them;
- Bank
- Password Manager
Once you have these set up, looking at something like a password manager can help a lot, the old suggestion was something like LastPass but given their track record in days past of being terrible at data security, I've moved to Bitwarden, lots of my friends and colleagues either choose Bitwarden or 1Password as they are the favourites, both having good qualities in their own way. If you are currently on LastPass and want to move to Bitwarden, the process is relatively painless;
- Export your data from Lastpass either via the Browser Plugin(probably the most common implementation for folks) or the Desktop Client:
- In the browser extension, navigate to Account → Fix a problem yourself → Export vault items → Export data for use anywhere. (If you're using an old version of the LastPass browser extension, you may instead need to navigate to Account Options → Advanced → Export → LastPass CSV File.)
- Enter your master password to validate the export attempt.
- Depending on your browser, your data will either be automatically saved as a
.csvor printed to the screen in a.csvformat, copy the contents to notepad or another text editor and save as .csv. - Import the data to Bitwarden; Log in to the web vault at https://vault.bitwarden.com, or
https://your.bitwarden.domain.comif self-hosting. - Select Tools from the top navigation bar.
- Select Import Data from the tools menu.
Complete the following fields from the drop-down menus:
- Import destination: Select the import destination such as your individual vault or an organizational vault you can access.
- Folder or Collection: Select if you would like the imported content moved to a specific folder or organization collection you can access.
- File format: Select the import file format.
- Select Choose File and add the file to import or copy/paste the contents of your file into the input box.
- Select Import Data to trigger the import. If you are importing a password-protected
.jsonenter the password into the Confirm Vault Import window that will appear. - After successful import, delete the import source file from your computer. This will protect you in the event your computer is compromised.
A similar process to the above can be followed for 1Password, but I recommend checking out their help page for that side of things as I don't use 1P.
Additional steps that can be taken to secure other things outside of accounts, such as websites, are using a web application firewall, and additional protections on your domain and DNS; for a lot of this, I recommend using CloudFlare as 1) it's free and 2) it's easy to set up, to get started, create an account over on https://dash.cloudflare.com/sign-up navigate through the account creation steps till you get to add a domain, then in step 1 scroll to the bottom where it says free;
The steps after will direct you through the steps required but often, it's a case of navigating wherever your domain is hosted and changing the name servers to CloudFlare's then, the rest is managed by CF.
Finally, once you've been through the various steps in this post, you will be on the way forward to a better security posture overall; the next part is being more vigilant around messages received on social media both via emails and Whatsapp/sms/Instagram/Facebook/Twitter/TikTok/insert another platform. Always verify who is messaging you, and if in doubt, go direct to the website or app in question rather than click a link or supply a token to a stranger.
Conclusion
Hopefully, this post has been helpful and given you a bit more of an insight into the steps that can be taken to properly secure your online life and accounts; equally, always be aware of what you are doing and if it feels to good to be true, it probably is.
