
Learning the Ropes 101: Burp Suite Intro


Burp Suite Features & Usage
In this post I will discuss the different features of burp suite, how to use them and how they are useful. I will also discuss how to set it up with different browsers and some advanced tips for the pro version. Also note that some of the tabs are only available in the pro version. This won't be a full on guide to everything as that is likely to be spread over a few posts.
What is Burp Suite?
Burp Suite (burp) is a web application testing tool designed by Portswigger. Currently it is the industry standard for web application penetration testing. It is also widely used by many individuals who partake in bug bounty hunting. This post discusses a few key features of the suite and some interesting tips along the way.
Setting Up
Before we go anywhere you're going to need to setup your environment. In order to do this you'll need two things; a Testing Browser & of course burp suite - this can be the free version or the pro version. I'll explain how to setup burp suite with both Firefox & Chrome, however these are not the only two browsers available.
Firefox
My personal preference as a testing browser is FireFox Developer Edition with the foxyproxy plugin for setting proxy settings. Firefox Dev edition has several benefits over normal firefox however it works just the same. The main reason for using it vs normal vanilla firefox is that there are extra dev tools built in plus there is a cool dark theme which is always nice.
-
Step 1: Download the software you need; browser, plugins & burp suite, all of which are linked above.
-
Step 2: Open burp and setup the browser proxy settings.
- Open Firefox and install foxyproxy if you haven't already, next left click on the fox icon next to the address bar, this will bring up the foxyproxy config window.
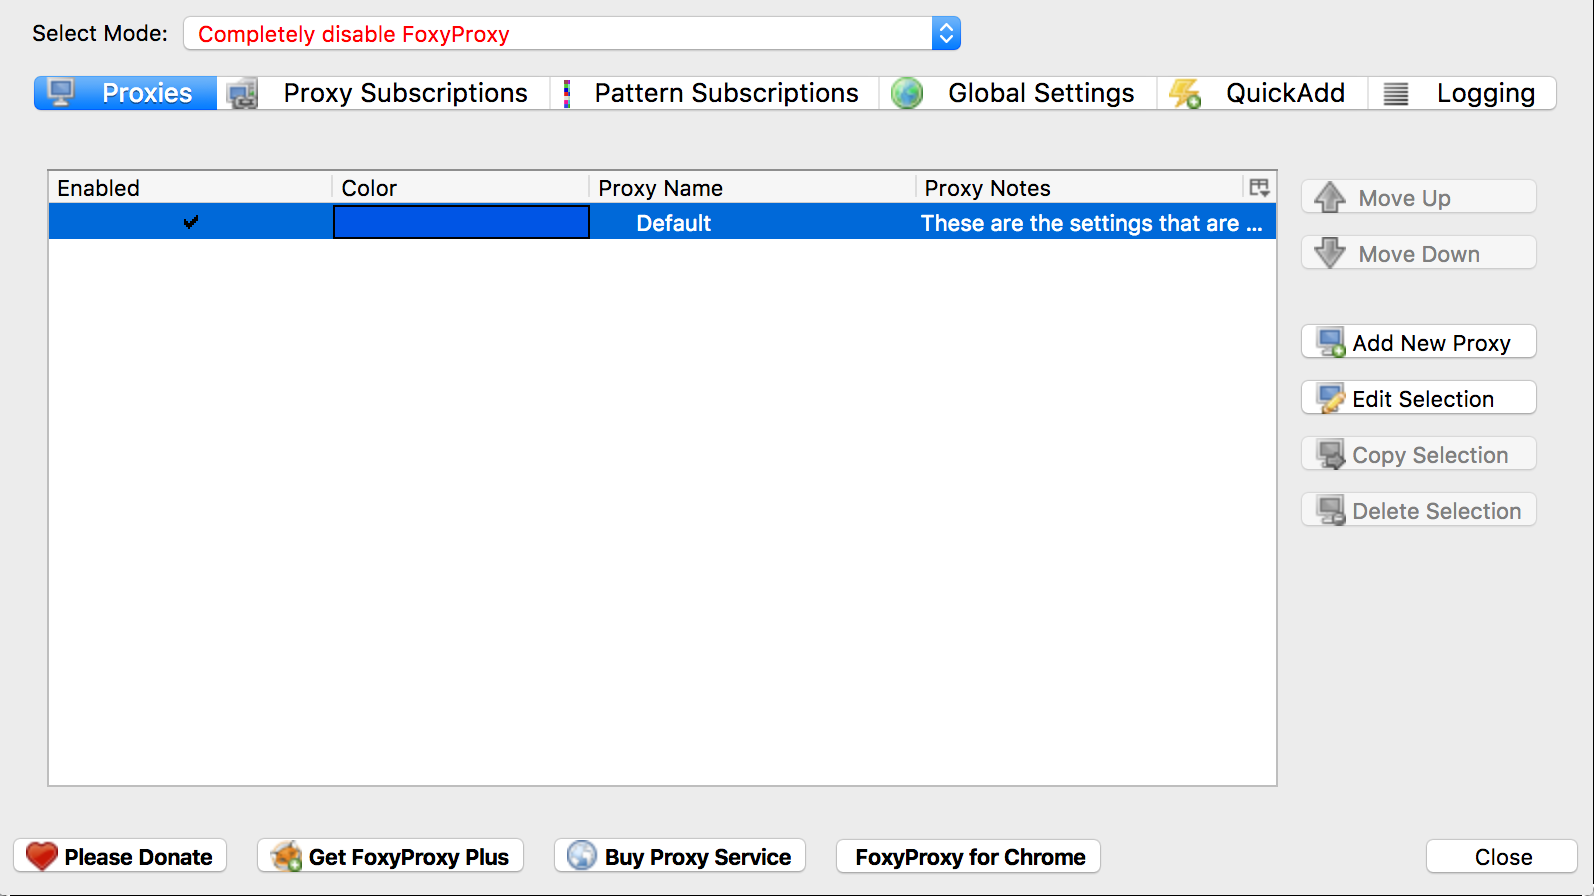
- Open Firefox and install foxyproxy if you haven't already, next left click on the fox icon next to the address bar, this will bring up the foxyproxy config window.
-
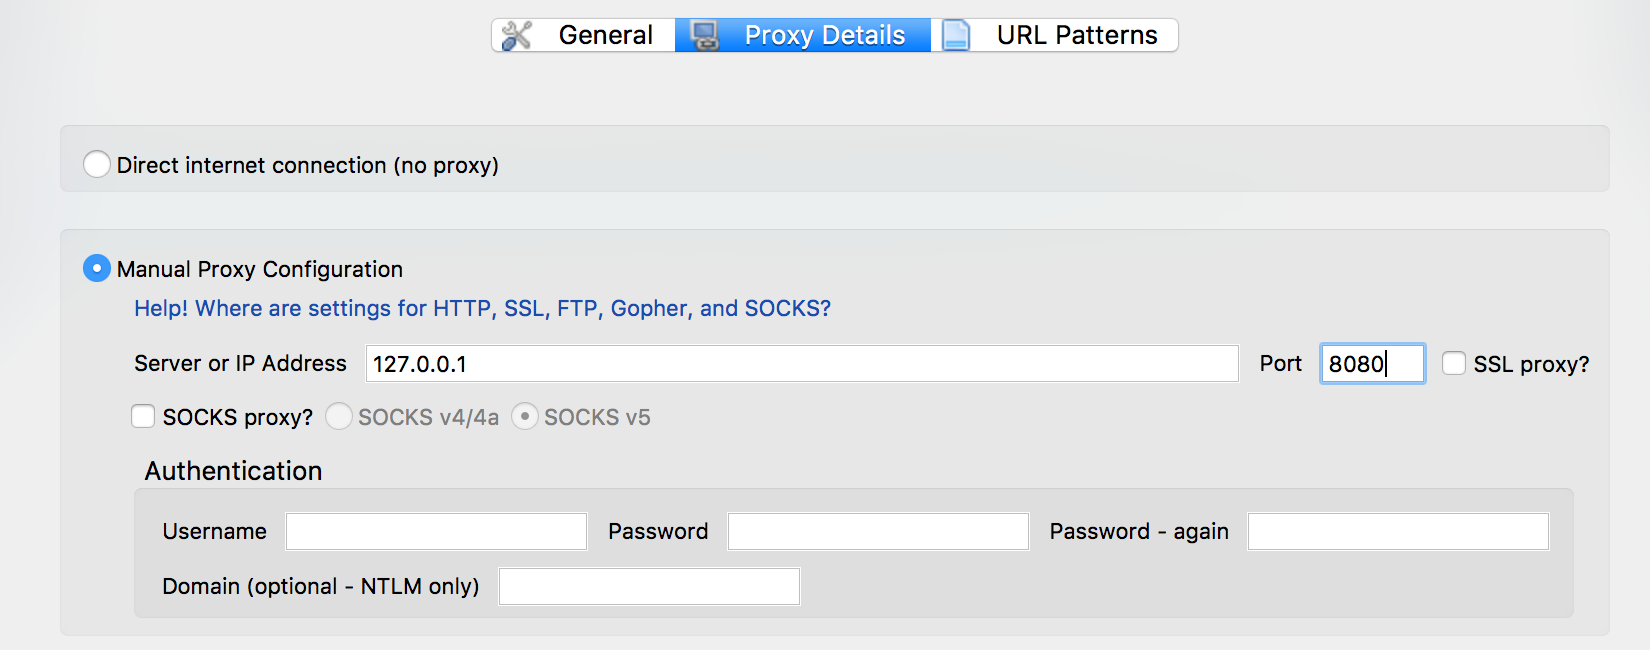
Select "Add new proxy", in host/IP address enter
127.0.0.1and port as8080then select OK to save. These values are the default listener settings for Burp Suite.
-
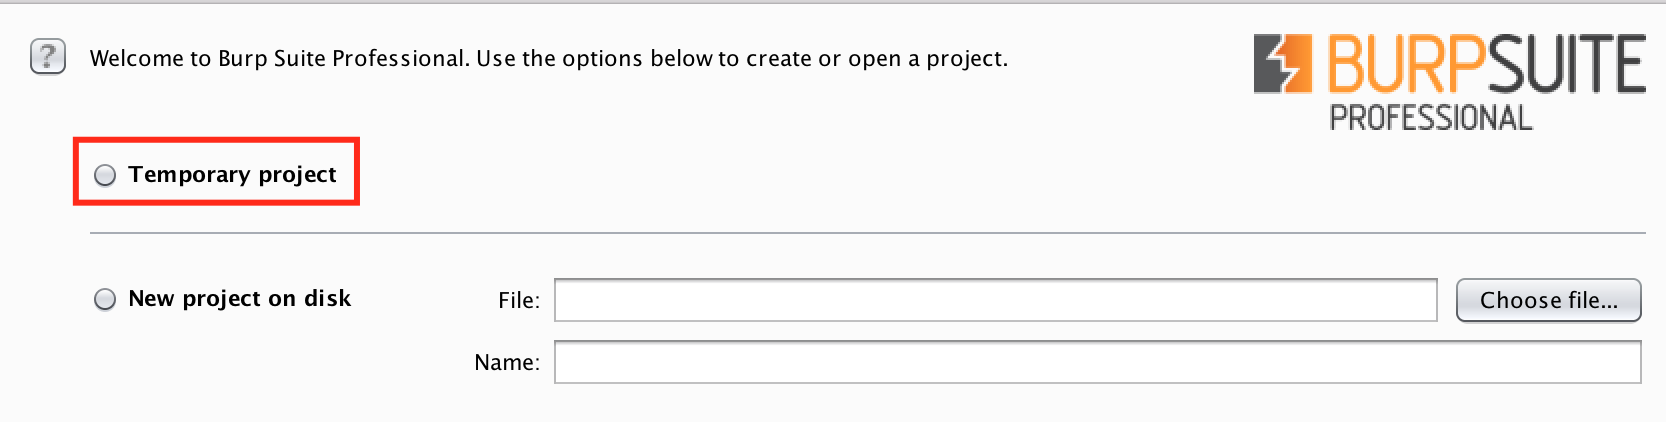
Now that we have firefox configured, move over to burp and either select to create a temporary project or a project with a name and file location(note this is only available in the pro version of burp). Generally if you're delivering a job it is useful to have a project file which will store all of your traffic.
-
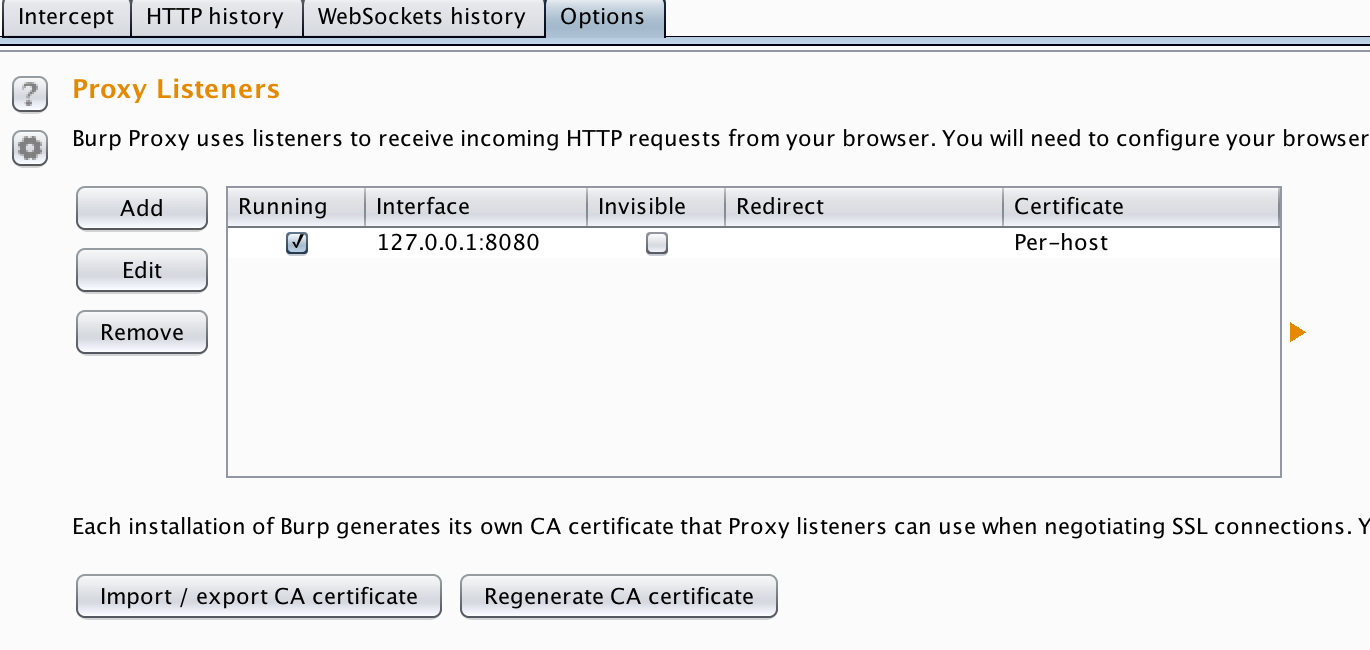
Within Burp navigate to the
proxy tab>options> Proxy Listenersand insure that there is one running on127.0.0.1:8080.
-
Step 3: To test we have a listener set up, navigate to Firefox, right click on
foxy proxyand select the proxy we setup earlier. Then, browse to a web site or IP. If the listener is configured correctly it should show a request within the proxy tab in burp. You have the option to forward or drop the request. Now that this is setup you can turn intercept off and all traffic will still flow through burp however intercept will allow you to 'play' with requests.
Google Chrome
The setup for chrome on windows is much the same as Firefox, as it can be configured to use foxy proxy. Specifically setting up chrome with foxy proxy is the same as it is on Firefox. Install the extension from the chrome web store and you should be good to go.
Project Files
Only available in the pro version
Project files very useful as I mentioned earlier, they store all of the traffic sent in a session including both in scope and out of scope hosts which can be useful to view later.
Essentially think of a project file like a temporary save location for information stored in your burp session that can be loaded at a later date. They work along side being able to save your session to disk which is accessible from the burp menu in top left hand corner of the screen burp > save state.
Target Tab
The target tab is one of the most useful tools within burp as it holds the site map for target sites that you are testing. Within the target tab there are two sub tabs, the Scope tab and Site map. Specifically the main information for an application that you are testing is held within the site-map tab.
Scope
It can be configured so that only targets that are within scope are displayed. To do this first you'll need to configure the sites within scope. Navigate to Target > Scope then Include in scope. This option will allow you to either paste a URL from the address bar or add manually using the add button. Additionally you can load a list of targets from a text file using the Load button, this can be very useful for adding in several hosts at a time.
Top tip for open scoped engagements, if a scope states that *.domain.com is within scope you can add this to burp's scope using: ^*\.domain\.com$. This will add all potential sub-domains into scope, what this also means is should you identify other hosts while browsing the main target they will automatically be added to scope and displayed in the site-map.
Tuning Site-map
Besides displaying all of the hosts browsed to in a burp session the site map tab can be tuned to only view the hosts you have set that are within scope. This can be achieved by clicking on the bar just below Site map and selecting Show only in-scope items. This will allow you to only view targets you've set as in scope. The image below demonstrates where this option can be found.
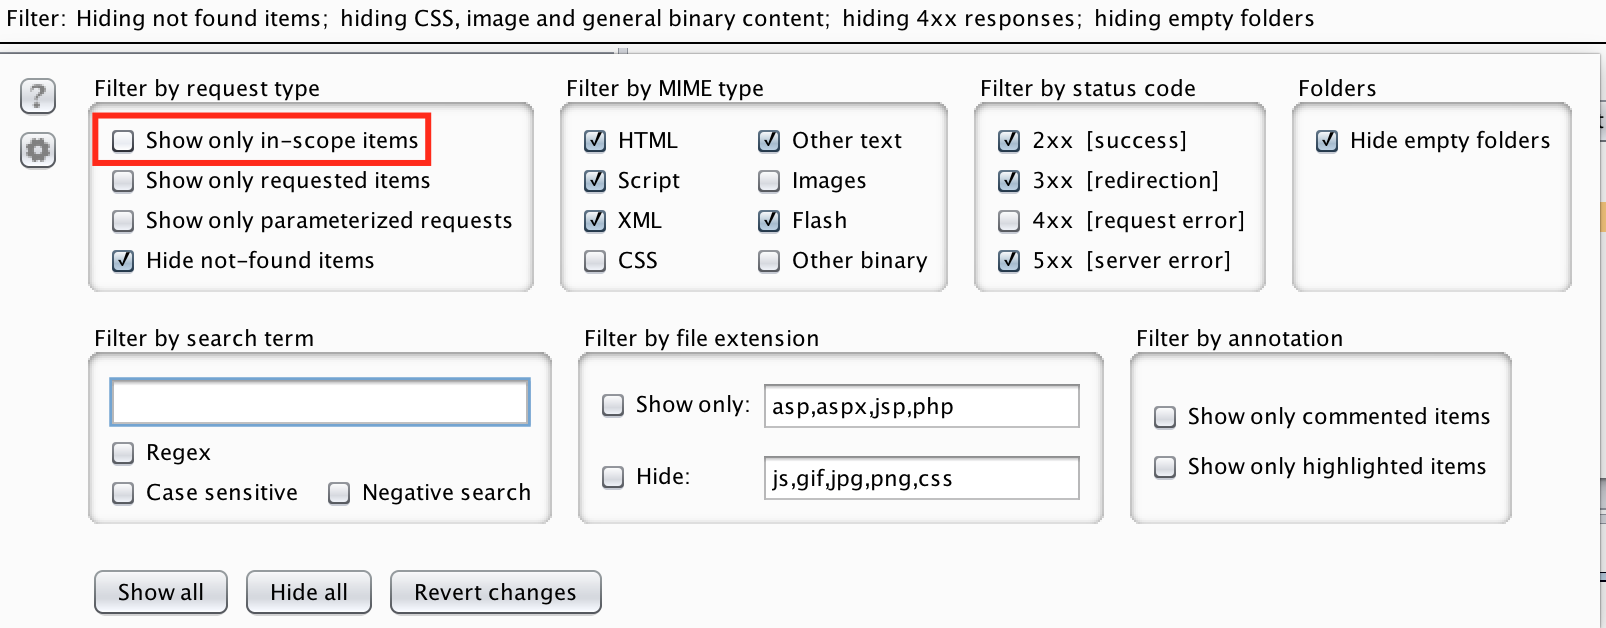
This menu area also allows you to tweak what is displayed, it can be useful to view only requests that have generated types of errors.
Spider
The spider tab can be used for discovering content on a site however I don't use if very often as it does generate masses of traffic. Additionally it can cause issues with the target applications if not tuned correctly.
To use it correctly, I suggest you disable the auto-form submission and auto login 'features' to insure minimal traffic generation. Doing so will prevent burp from attempting to flood the target site with form submissions of Peter Weiner/Winter.
Scanner
Only available in the pro version
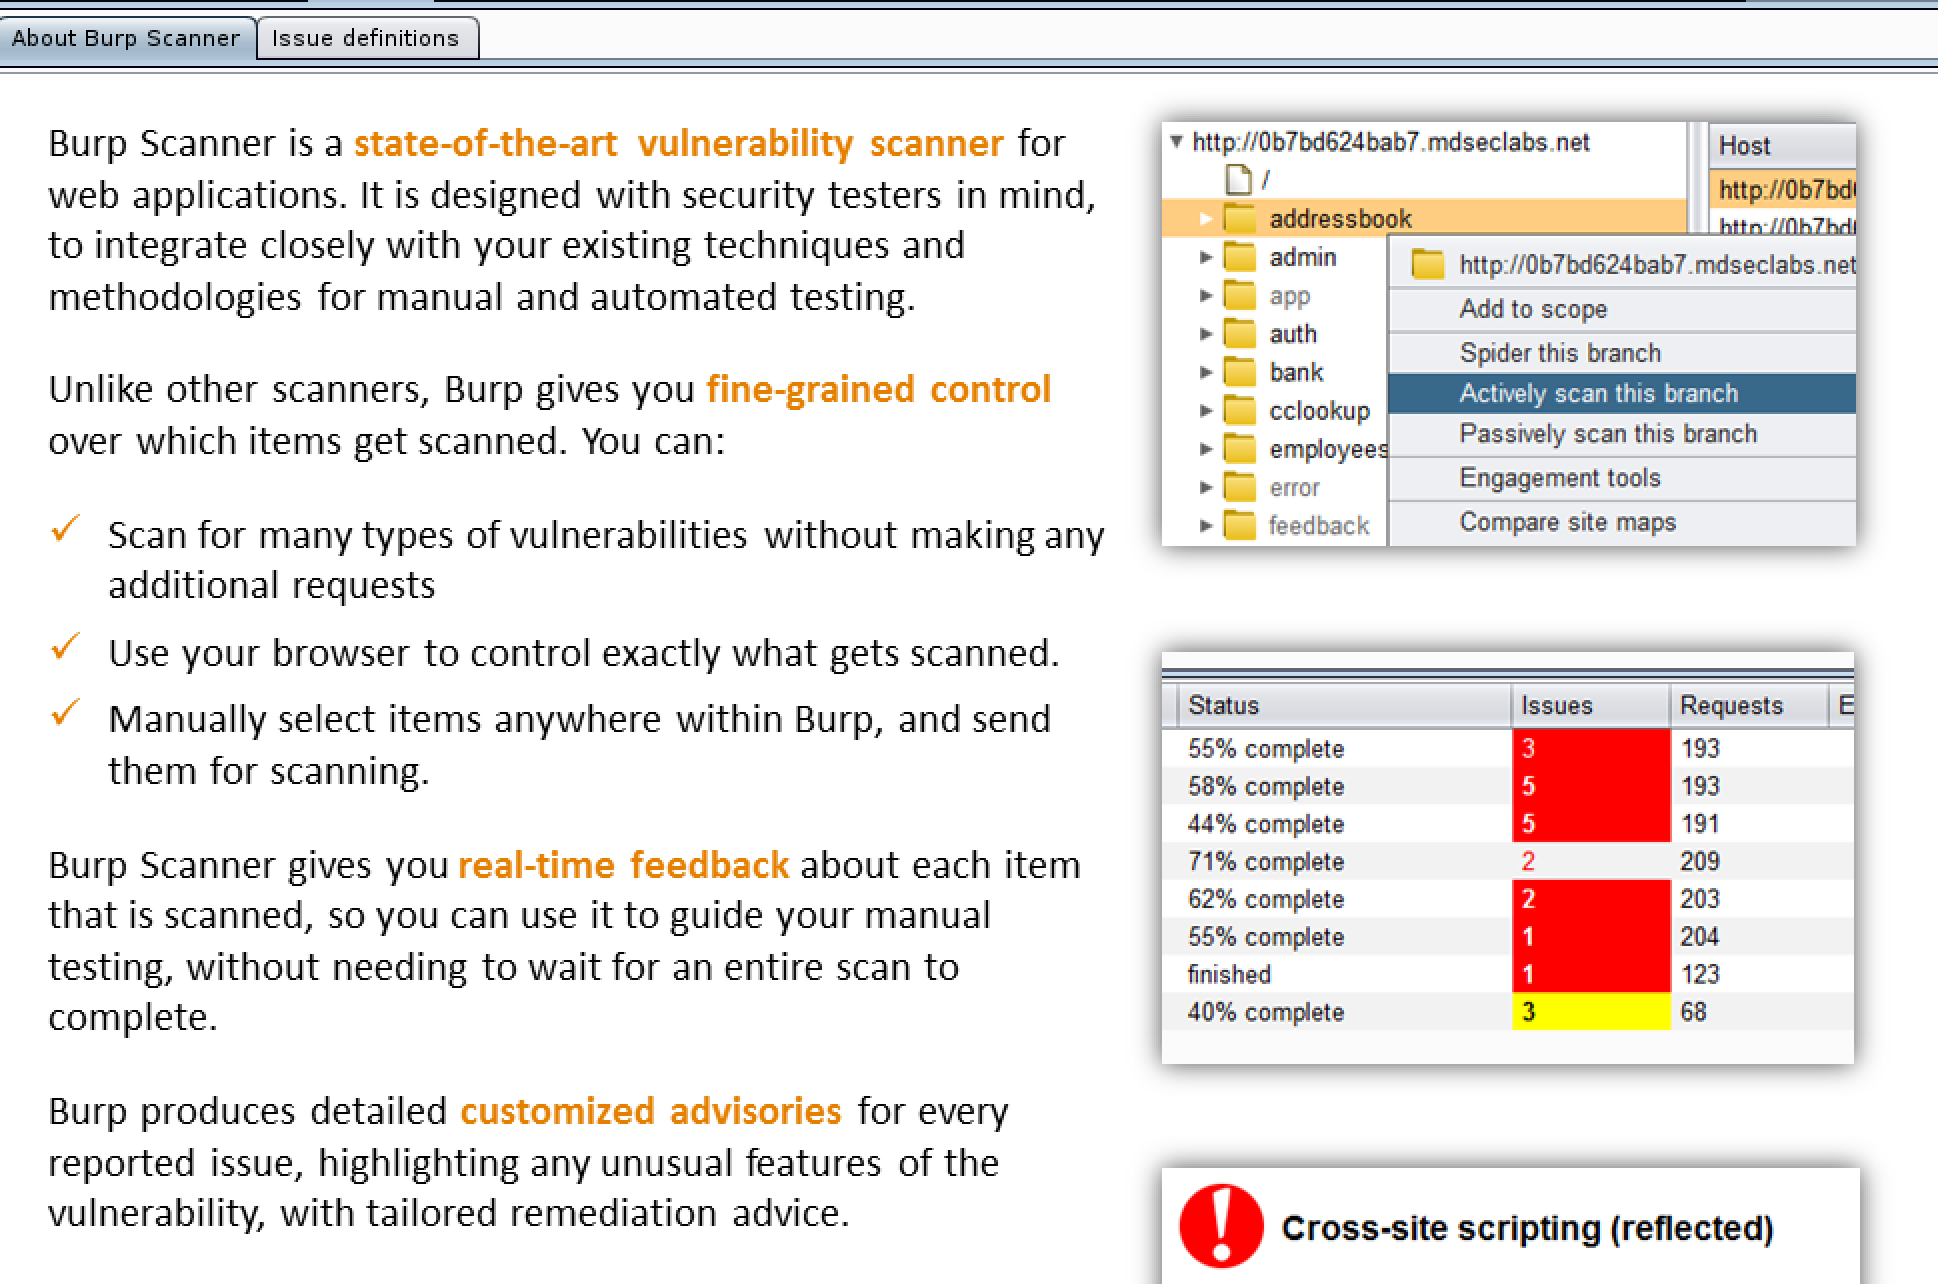
The scanner tab is very useful as it picks up on 'low hanging fruit' vulnerabilities within an application. However like all of the other tools within the suite it can be tuned to work better. By default the options for it are pretty good but with tuning it can be great!
Pairing Intruder with Scanner
Only available in the pro version
To tune the scanner there is a little known trick that will allow you to pinpoint scanning. This can be achieved by trapping a request that has parameters you want to scan then, right clicking on it and sending it to intruder. Once the request is in intruder manually select the areas in which you want to scan then select Actively scan insertion points. This will send the scanner off against only the points in which you've selected instead of randomly scanning points in the app/target.

This can be very useful for pinpointing vulnerabilities in applications that would otherwise be missed potentially.
Repeater
The repeater tool is arguably the most useful and powerful section within the burp suite tool set. It allows requests to be passed to it and modified then resent to the server. During a test I will spend a lot of time in here playing with requests and modifying different parameters to see their responses.
Specifically it has two main uses, the first of which allows free manipulation of requests. Allowing you to target specific parameters and functions within an application. The second while not a feature or possibly not the intended use, it can be used as a clipboard/archive or interesting requests for you to go back to look at. Imagine you're looking at an application which shows signs of processing certain characters differently, you can right click and send this to repeater to look at later. Having the request in repeater will allow you to manipulate it at a later time.
Intruder
The intruder tool has many many functions, however in this post I am only going to discuss a few of these. Mainly it can be used for fuzzing, error checking & brute-forcing.
In order to utilise intruder, select an interesting request either from the proxy intercept or another you've previously saved in repeater. Right click and select send to intruder. When the request is within intruder select the positions tab to select your inputs, this will look similar to the image below.
The payload positions are up to you to set, however burp will auto-select what it thinks are parameters, you can clear this using the clear button, then select your own ones by selecting the parameter then choosing add §. There are four attack types available to use in intruder, the subsections below explain what each does.
Sniper
The sniper attack takes one wordlist as an input and iterates over over each parameter, one at a time. If you have multiple insertion points, it will enumerate the first parameter with all the payloads from the wordlist supplied and move on to the next and so on. It is best used when you're wanting to fuzz either single or multiple parameters with the same wordlist.
Battering Ram
Like the sniper attack, the battering ram uses a single wordlist however it will iterate over multiple parameters with the same payload for all the parameters. This can be useful when you're looking at how different parameters react to certain payloads.
Pitchfork
The pitchfork attack type runs through multiple parameters at the same time using different payloads for each parameter. This takes a single or multiple wordlists but will iterate through the words in the list split across selected parameters. An example of this is shown:
1st request - id=wordlist1[1]¶m2=wordlist2[1]
2nd request - id=wordlist1[2]¶m2=wordlist2[2]
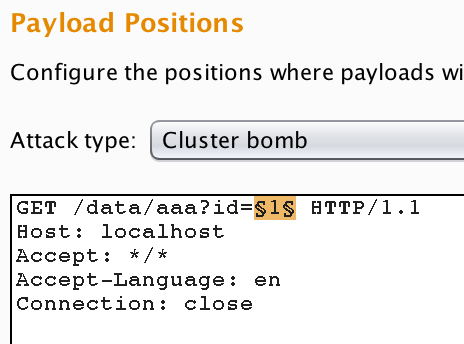
Cluster Bomb
The cluster bomb attack type will take multiple wordlists and is useful when you have multiple parameters. It will run through over multiple parameters by using all the possible combinations of payloads from the multiple wordlists. So if you have multiple parameters, it will enumerate over one of the parameters with all the payloads from its respective wordlist, while the other parameters have the first payload from their respective wordlists loaded.
This can be very useful for when you are brute-forcing logins or other parameters/forms requiring two or more inputs.
Brute Forcing Basic Authentication
A scenario where intruder can be very useful is when it comes to brute-forcing a HTTP basic authentication login mechanism. In order to do this, first you must issue a base request with any values as the username and password, send this to intruder. I've included an example below.
GET /admin HTTP/1.1
Host: localhost
User-Agent: Firefox
Accept: text/html,application/xhtml+xml,application/xml;q=0.9,*/*;q=0.8
Accept-Language: en-GB,en;q=0.5
Connection: close
Upgrade-Insecure-Requests: 1
Authorization: Basic YWRtaW46YWRtaW4=
Notice the bottom header Authorization: Basic YWRtaW46YWRtaW4= this is the login value of admin:admin in base64. In order to attack this we're going to use some of burp's more advanced intruder settings.
Mainly the custom iterator function, which allows you to split payloads up by a certain character or set of characters of your choosing. In this example I'll be demonstrating a brute-force using a wordlist, which in other words is a dictionary attack as opposed to a pure brute-force attack.
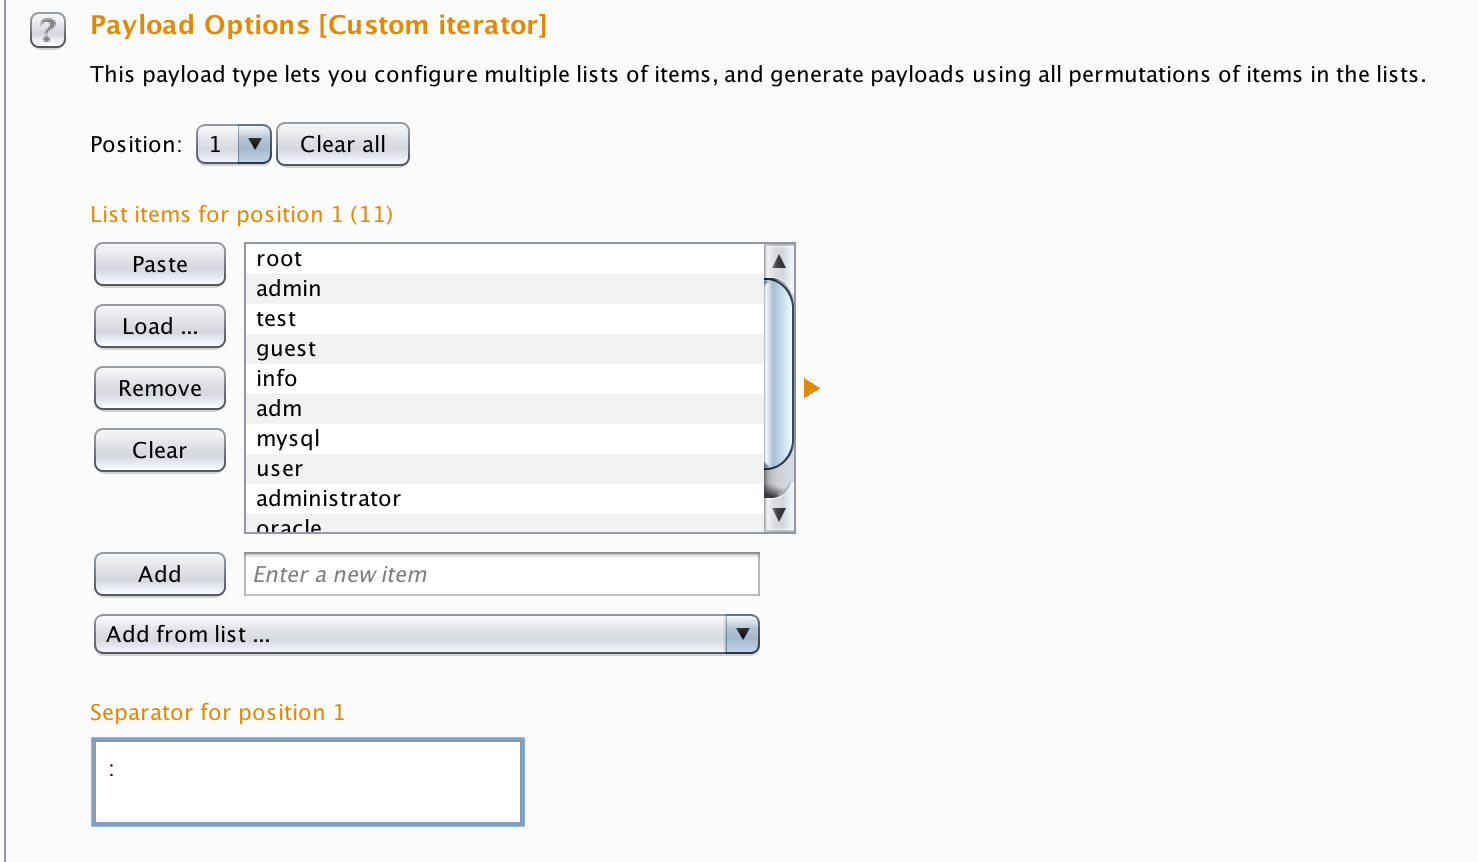
Using a custom iterator allows you to generate your own custom payload string consisting from several substrings. For each substring you can specify what the separator is which is basically a suffix. The Intruder calls these substrings “positions”.
Setting up the attack, the first thing to do is select the base64 string in the Authorization: Basic header and change the attack type to sniper. Next go to the Payload tab and select the Custom iterator option from Payload type menu.
Next select position 1 from the Position menu and load your usernames list in this . Put a colon(:) in the Separator for position 1 text box.
Then change the position to 2 then in position 2, load the values you want to use for password guessing, just as you did for position 1.
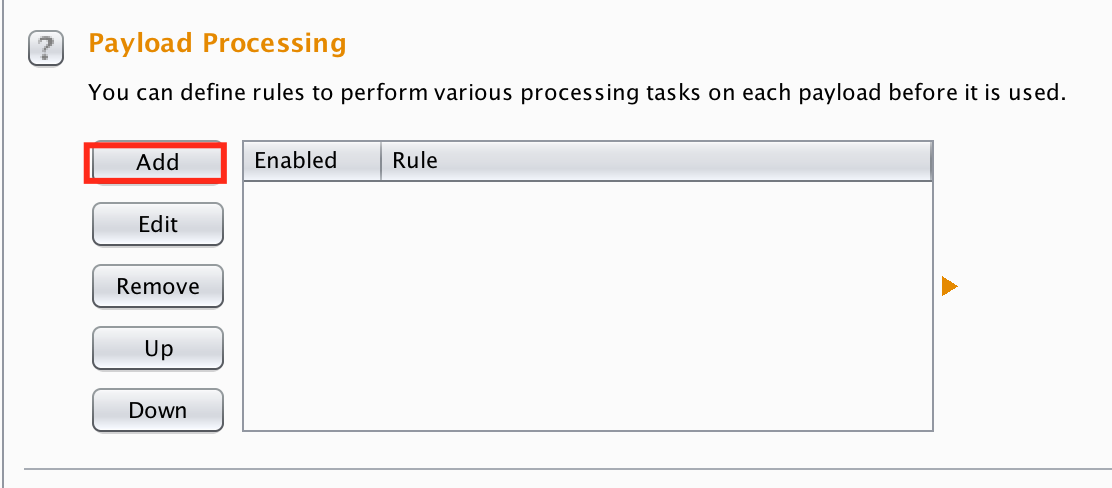
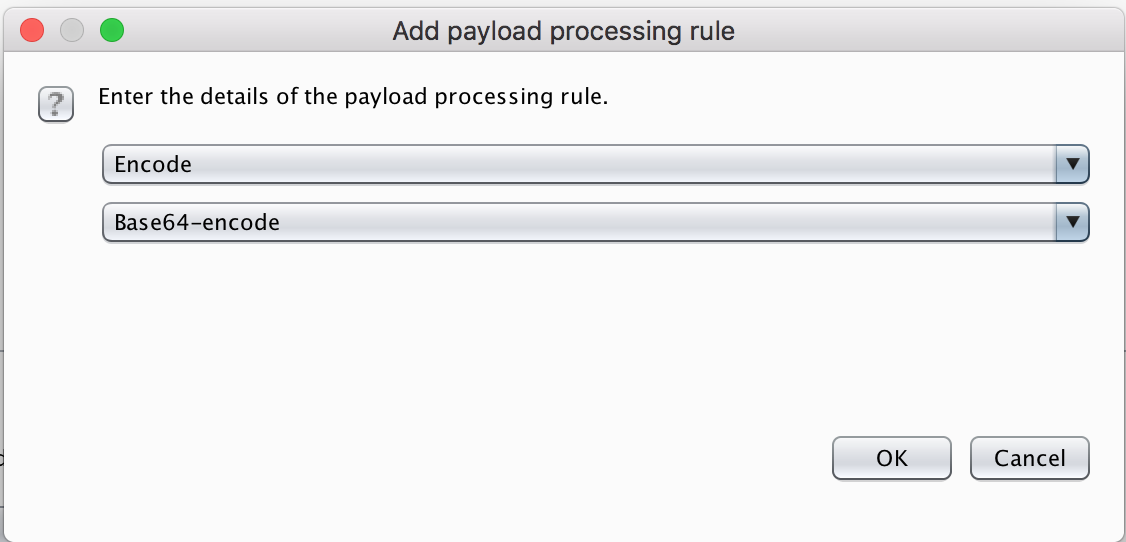
After you’ve set your two positions you need to tell the Intruder to encode the payload string using Base64 encoding. To do this go to Payload processing section and click Add button. Select Payload encoding option and then Base64.
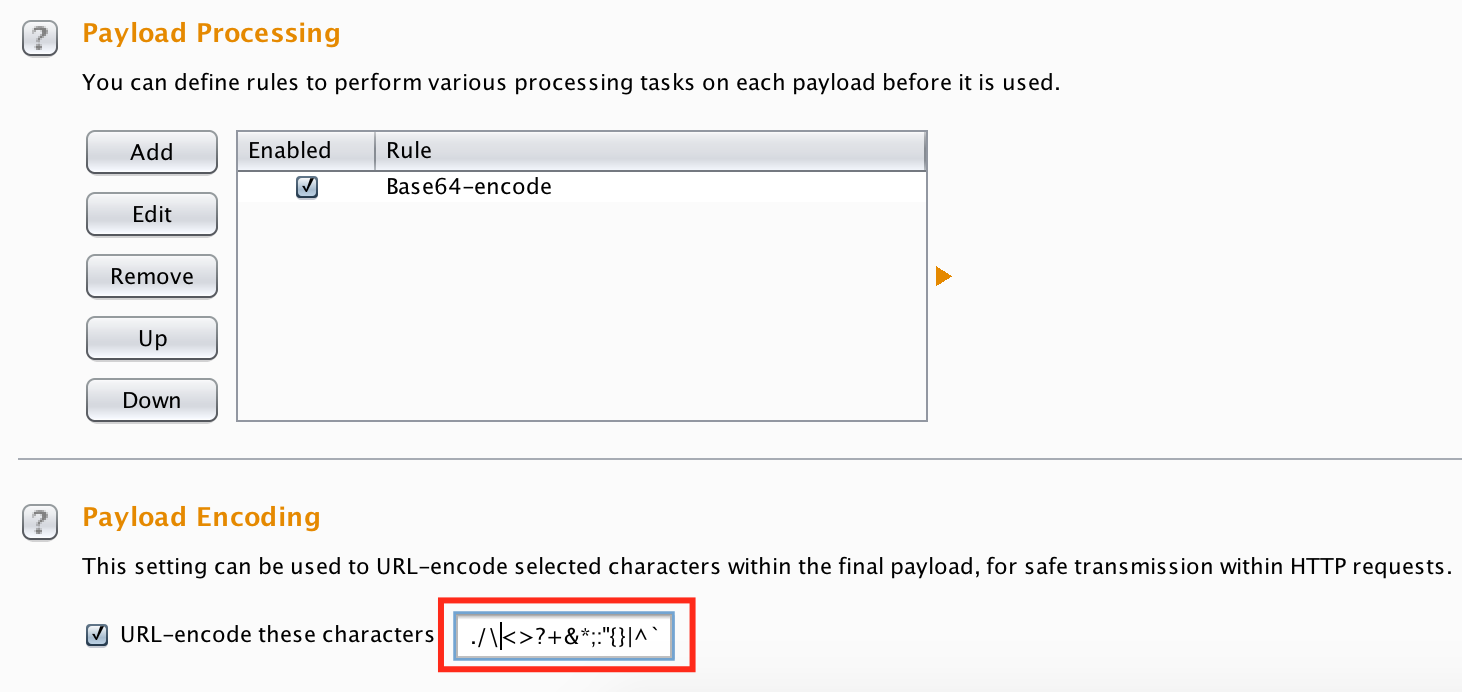
By default burp intruder will URL encode select characters, I recommend that you remove the = symbol as it is used by base64 for padding and this can introduce issues later on.
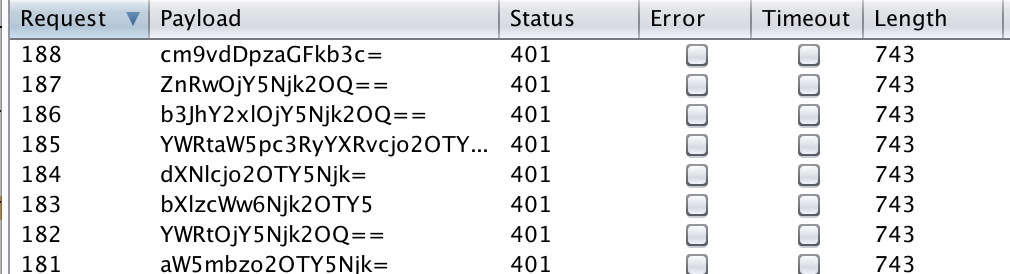
When this is done simply select start attack, burp will now run through the usernames and passwords you've provided.
Decoder
As with all of the tools within burp suite, each has a useful function. The decoder tool is all in the name, it decodes a select type of character sets and encoding types:
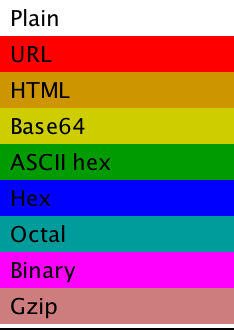
- Plain Text
- URL Encoding
- HTML
- Base64
- ASCII Hex
- Hex
- Octal
- Binary
- Gzip
Each of which can also be encoded into using the decoder tool. This is particularly useful for when you encounter parameters and data within requests which is encoded. By default burp will attempt to auto detect the encoding however you can manually select which type of encoding to decode as too. Decoder can also be used to take checksums of strings, using a variety of hashing functions, these are located in the hash drop-down menu.
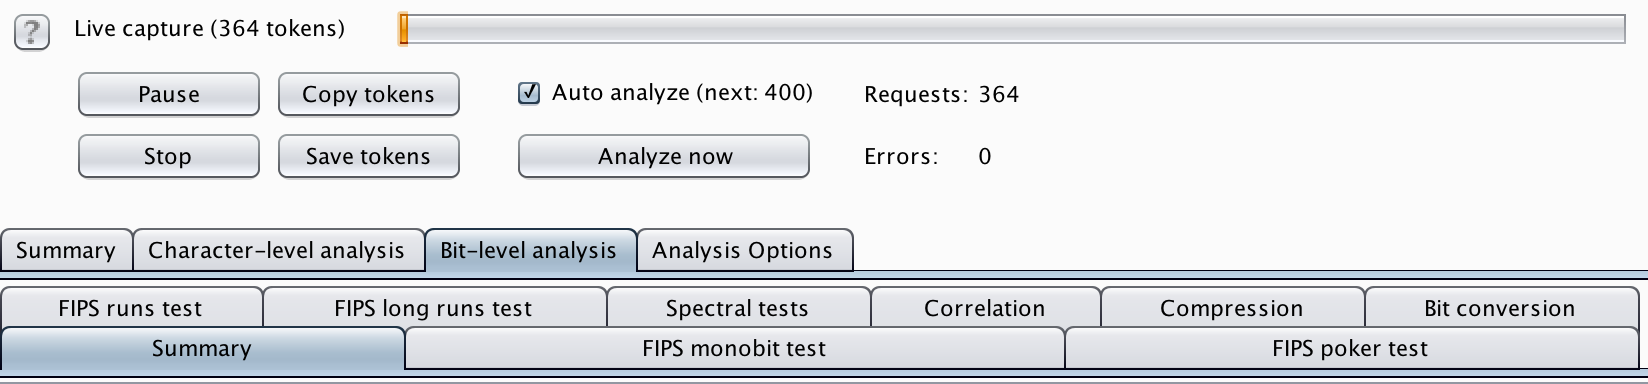
Sequencer
The sequencer tool has many functions but its main use is for checking the entropy of tokens and cookies. It is accessible by sending requests to it that can then be replayed in the 100s or 1000s to check the randomness of created values. This can be very useful for testing the randomness of cookie or CSRF token generation, mainly a use when testing authentication and authorization but can also be used for testing UUID and GUID values too.
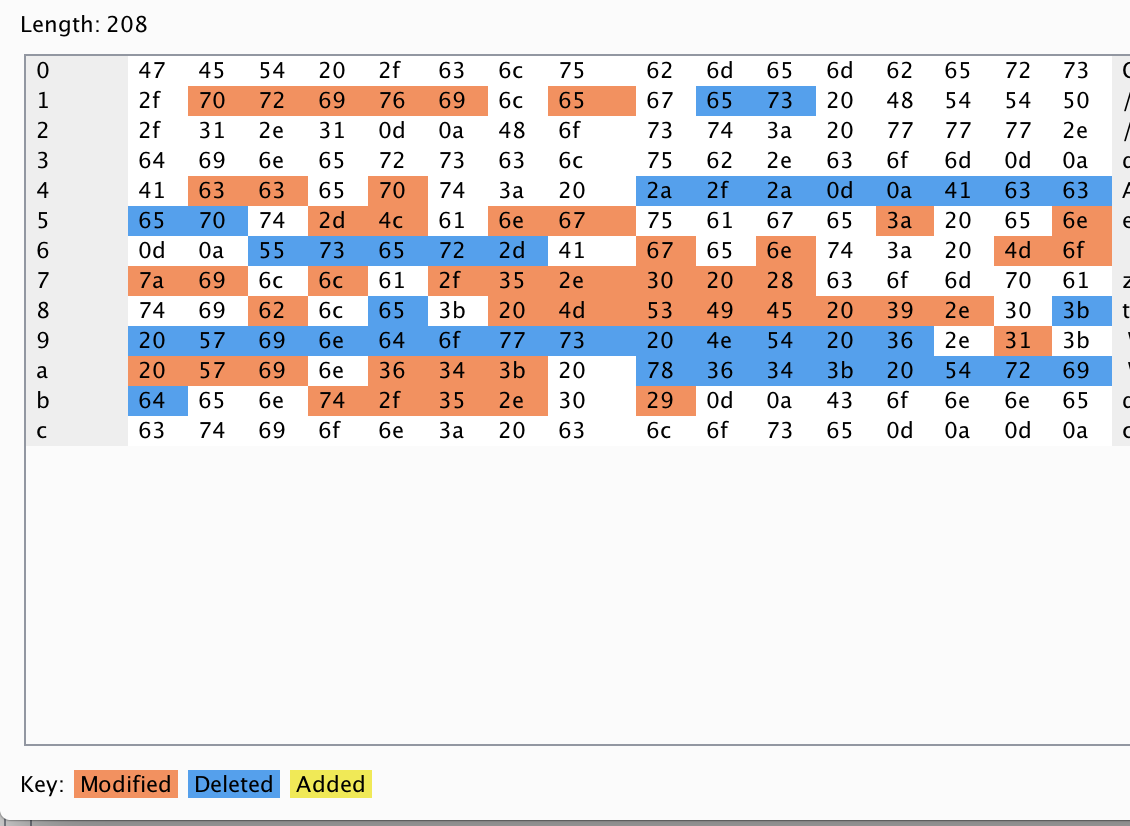
Comparer
Comparer is essentially a diff tool to allow you to check the differences between two or more requests either based upon the words or bytes. This is useful when an application reacts differently to certain characters or words being used, it can be useful to identify more information about injection type vulnerabilities. To use it simple right click on a request and select send to comparer, then select a second request and do the same. Then navigate to the comparer tab and your requests should be there now. Simply select bytes or words, this will show a comparison of the requests you've sent and highlight the differences.
Extender
Finally the extender tab is where add-ons/plugins for burp are located. Housed within this tab is where extensions can be installed and added. Additionally all information surrounding various environment files such as Jython and Jruby can be set within this tab. This allows for usage of other 3rd party extensions build by developers that have been approved by Portswigger. Also located within this tab is information surrounding all of the APIs that Burp suite uses, allowing you to write your own extension. For more information on creating an extension check out Portswigger's site here.
Inbuilt Documentation
If you want to learn more information about certain aspects of burp suite that you're unsure of. The application does have a very comprehensive inbuilt help function. This is located in the help tab in the top menu bar.
Did you enjoy this? Check out the other #ltr101 posts here or consider buying my book.
