[Ongoing Project] Building the Dream Home Network
This is not uber leet hax0rs stuff, but it does serve as a somewhat tutorial on how I set up my new home network in my flat.

![[Ongoing Project] Building the Dream Home Network](https://images.unsplash.com/photo-1477519242566-6ae87c31d212?ixlib=rb-0.3.5&q=80&fm=jpg&crop=entropy&cs=tinysrgb&fit=max&ixid=eyJhcHBfaWQiOjExNzczfQ&s=fc23e529a53f6fa80f0e40976e6af76f&w=2000)
Taking a step away from tutorials for a post or three, here's a write-up of another weekend project I took up[It's been a long time in writing so sorry for the delay folks!]. It is not uber leet hax0rs stuff, but it does serve as a somewhat tutorial on how I set up my new home network in my flat.
It includes:
- Ubiquiti unifi Kit
- HP micro-server Gen8
- Smart Home Things
Those of you who have followed my blog(zerosec) for a while(I'm talking about when it used to be WordPress!!!), you might remember the hardware projects I used to write about.
For those who don't, I have an HP Micro-server Gen7 currently which is utilised as a home-lab for a virtual network. On my old blog, I did a post on how to flash the bios and set it up with ESXi. The machine ran great for three years however due to a hardware failure I have had to retire it & acquire another slightly newer one from eBay.
The Baseline
I now have an HP Micro-server Gen8; the base specs are as follows:
CPU: Intel Celeron G1610T - 2.3 GHz (Upgraded to Intel Xeon E3-1265L V2 2.5 GHz)
RAM: 4GB (16GB When Upgraded)
HDD: 4TB (16TB When Upgraded)
GPU: NVIDIA GT310
As this is going to serve as the base for a virtual lab, I have upgraded the ram, CPU and storage to something a little more manageable.
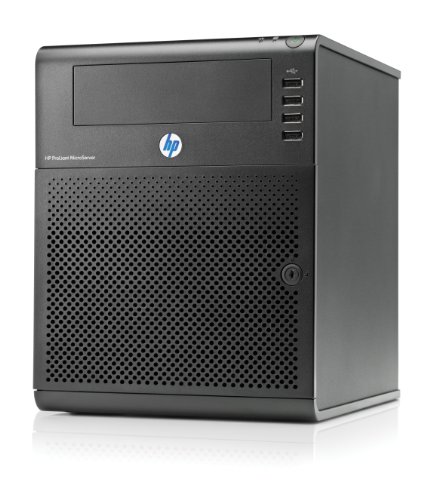
If you have never come across the HP Microserver line, they look like the following.
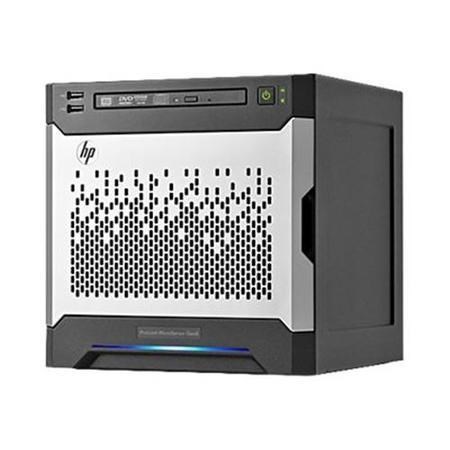
- HP Microserver Gen7
The Gen7 features a black aluminium body, with internals supporting up to four 3.5" hard drives & without flashing the BIOS supports up to 8GB of RAM (with flash will support 16GB). If you have a Gen7 and are interested in upgrading to 16GB, I highly recommend a quick google search for the bios hack.
By default, the Gen7 supports four drives in the bays however with all hardware it can be hacked to include a 5th bay in place of the 5.25" Slot in the front.
- HP Microserver Gen8
The Gen8, on the other hand, is slightly more up to date looking, black and silver with the same drive capacity by default however instead of a 5.25" drive in the front it has a slim DVD drive which will fit a 2.5" drive be this SSD or HDD. It also has support for up to 16GB by default which is nice.
Setting Up
Once you have your hardware all plugged in and set up the next stage is likely to chuck and OS or baseline of some description on the poor little machine. For this, I selected to use the internal USB-A port to install VMWare's ESXi. To download it you'll need to create an account on vmware.com; however, when done you can download an iso for ESXi 5.5+ and burn this to a USB.
To burn to USB, I used rufus which is a program for windows to allow the creation of bootable USB devices. Simply select the ISO you've just downloaded then choose the destination device. Rufus will do the rest for you like creating partitions, installing the bootloader and finally writing the files to the USB device.
Configuring
Once the image is burned to a USB the next step is booting the device, to do this you can use any of the USB ports on the server. In my case, I used the internal USB header as a boot port(the motherboard has a USB port directly on the board for this exact purpose). An example image of this is shown below:
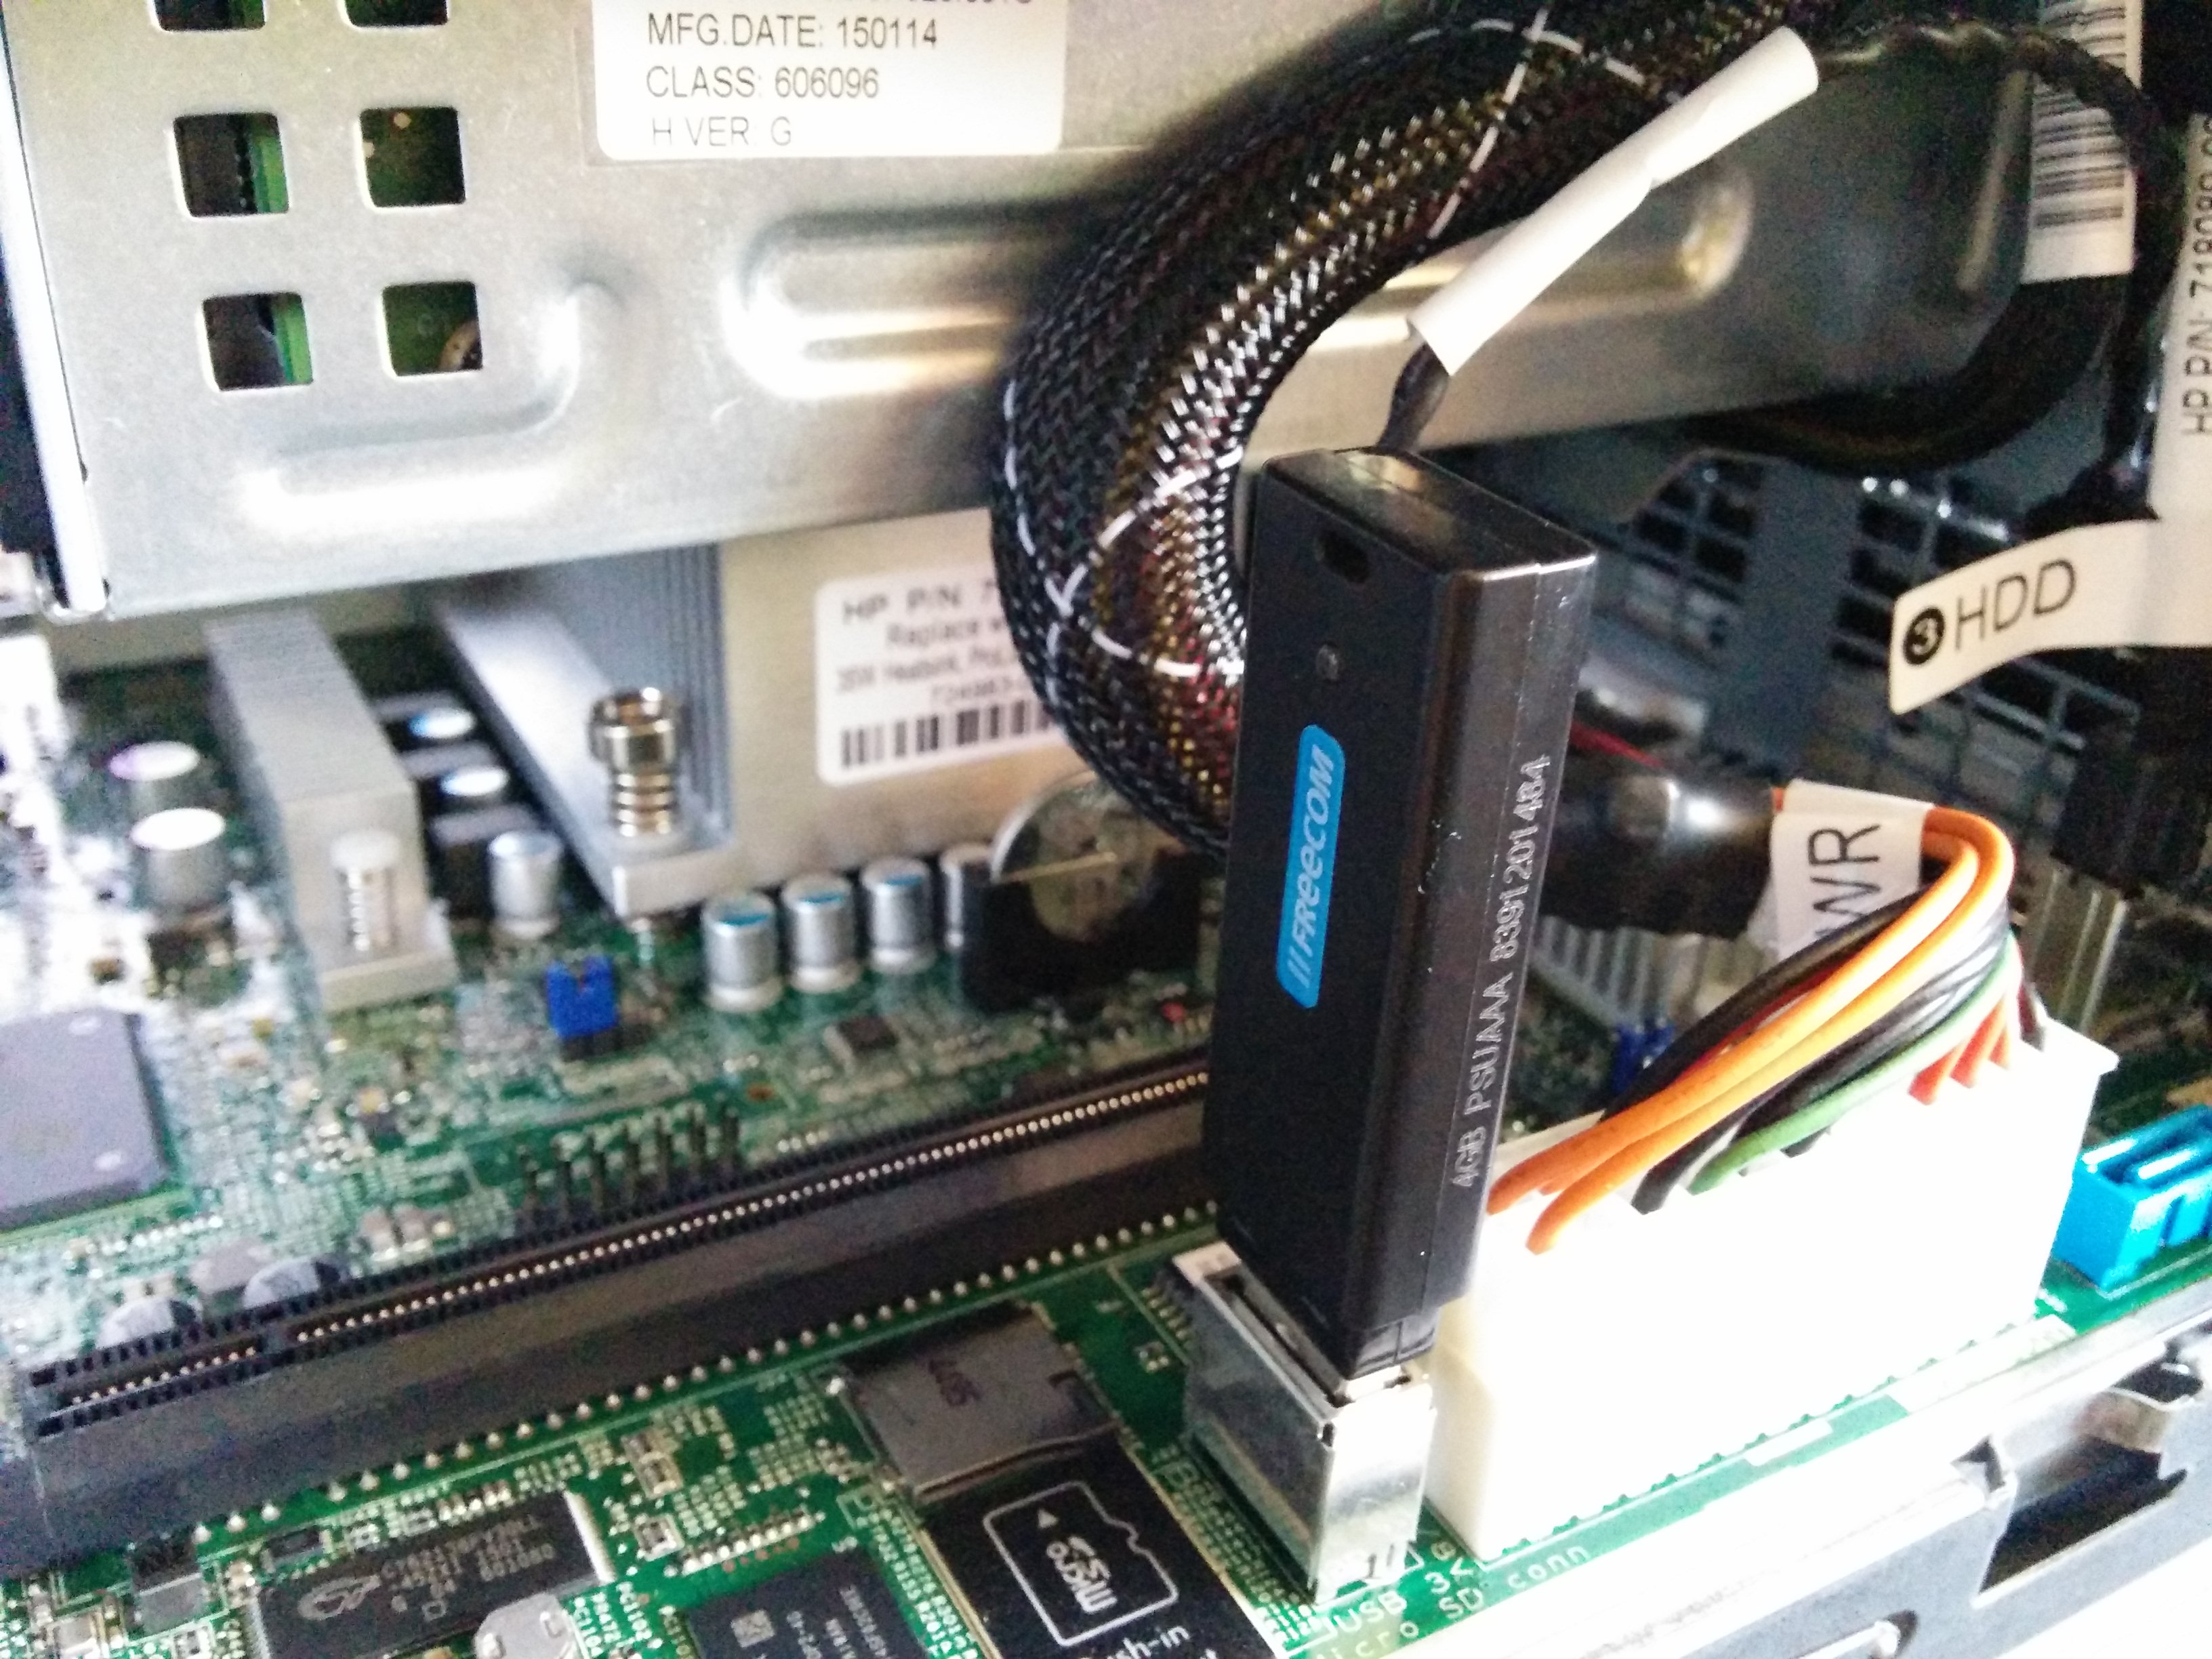
As can be seen, there is both a USB header and a MicroSD card slot. As a result, either can be used to boot an OS. Once booted into ESXi, it is fairly intuitive as it gives you an IP address to connect to and other options to set the administrative passwords.
Booted and setup, the next step was to create some datastores within the GUI, these serve as virtual hard disks for each VM to pull from. You can allocate as little or much of the drive as you want per VM.
My setup currently consists of a home lab VM network which has ~8TB worth of VMs including a windows domain, several Linux & Solaris boxes plus a few obscure *nix OSes for playing around with. The other storage space is occupied by FreeNAS for backup of devices on my home network.
iLo.. 'cause why not?
Alongside typical USB boot, the server also comes with an Integrated Lights-Out(iLO) interface which serves as headless access to the BIOS and boot process. Setting this up was relatively easy, there is a windows client available which allows you to connect to the IP, to find the IP you can either attach a monitor to the server OR run arp -a on the local network(assuming you have windows), you can use arp-scan on 'nix/OSX too, to find the machine's IP. Then just connect to it with the ILO client and you can play around.
Media Server
Following setup of the baseline I opted to setup an Ubuntu base image for a media server, this image contains Plex, some TV & Movie download schedulers & transmission, I have another post coming at some point on this. In the meantime I wrote a quick setup script that you're welcome to have a look at, it can be found on my git here. The aim is to have this dockerised at some point!
Networking & Cabling
Alongside the server and media aspects of my home network, I also acquired some Ubiquiti gear for the flat including a switch, unfi security gateway(USG),a cloud key and a metric whack tonne of CAT6 cabling!
The next sections cover a general overview of my setup and what each bit does.
Security Gateway (USG)
The USG is essentially your router and firewall that will sit at the edge of your network between your LAN and the INTERNET. It has one Ethernet port for the WAN, one for the LAN and on the latest firmware upgrade, the VOIP port can be set up as a second LAN port for extra security or other witchcraft, the other remaining port is the Console port for emergency 'oh shit' debug moments.
Currently the second VOIP port isn't setup on my home network but I have plans to utilise this in the future as another line. The main WAN port carries my internet line from my ISP at current.
I have had a varying degree of different fibre connections in the past however at the moment I have fibre to the cabinet(FTTC) as it's cheapest(and does the job). With this I run a connection from my Zen provided router to the WAN port on the USG.
On the other port, the first LAN port connects to my Power over Ethernet (PoE) switch which powers both the cloudkey & wireless access point.
UniFi Switch + AP Pro
So from the USG I have a connection into my first switch which runs most of my PoE devices, this runs the cloudkey(used for managing the setup), Access point & soon to be added CCTV cameras(need to buy one more and mount them all).
Having the ubiquiti stuff all setup to talk to each other allows me to view interesting stuff on my network and gives me all sorts of pretty graphs like this one:
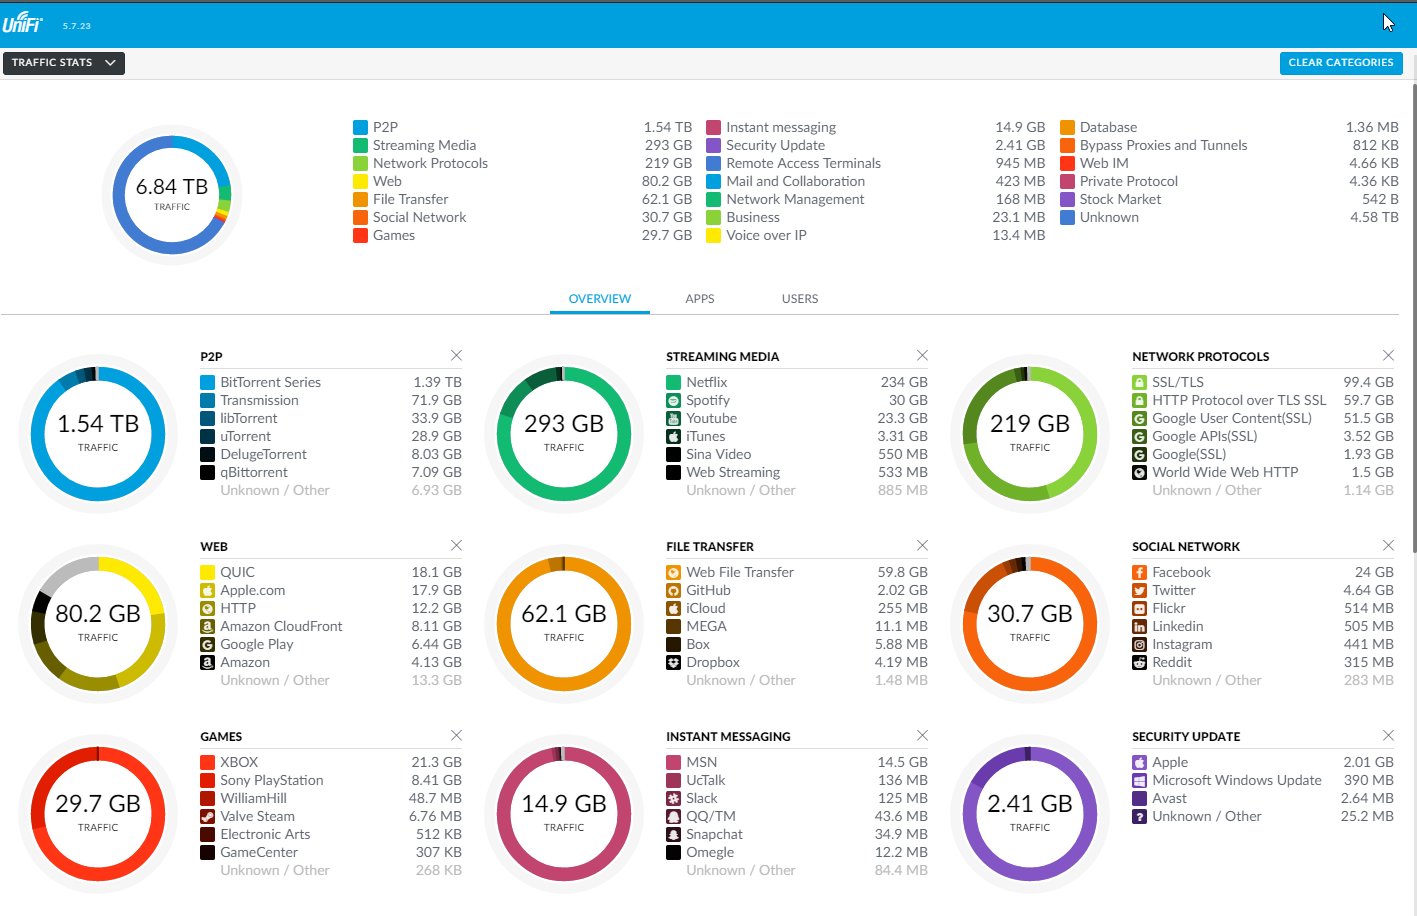
Basically my home net does Deep packet inspection on all of my traffic to track all the things that go through it also allows me to triangulate devices on my network using a lot of bandwidth etc.
The AP runs three networks too, one for my work stuff and another for all of my personal devices & a final one for all of my IoT devices like lights, alexa(s), RF blinds and other random shite. All complete with client segregation and VLAN fun!
There are a few plans for other things to add in the future including:
- Full Windows Lab Domain (Work in Progress)
- Pi-Hole for DNS malarky
- As an update since I actually first wrote this, I have since setup a Pi-Hole on my network thanks to Scott's guide here, took me all of a few hours to do!
- Speedtest monitor similar to the one I've blogged about previously
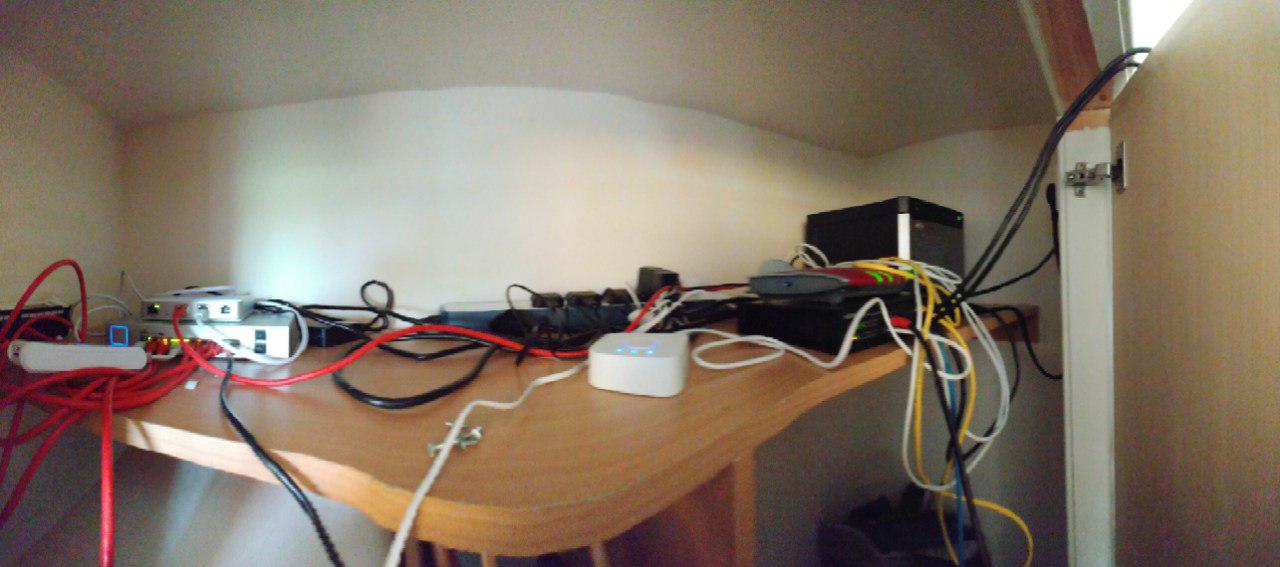
All Setup & Running
So everything is in place and the server wardrobe is functional: